Tag Archives: Makeup

Product Review – Charlotte Tilbury Filmstar Bronze and Glow

I have been lusting after this Charlotte Tilbury face sculpt and highlight duo for ages!  The reviews were pretty much amazing, and lots of my makeup artist friends were saying it was a must have in their kits!


I finally gave in and purchased it online from Net-a-Porter for around $100 – you can buy it here http://www.net-a-porter.com/product/418026/Charlotte_Tilbury/filmstar-bronze-glow-16g

CharlotteTilbury

After the first time I used it I was blown away!!!  No other sculpting powder is as natural and uplifting as this one.  And the highlight is so subtle, yet effective.  I fell in love instantly!!!

You can see an incredible video of how to use it by the sensational Charlotte Tilbury herself here: http://www.charlottetilbury.com/uk/filmstar-bronze-and-glow.html

There are so many over-the-top contour powders and highlighters (and artists!!) on the market at the moment.  And anyone who knows my style knows I am just not into that OTT sculpting that looks like mud smeared across the cheekbones, down the nose, and across the forehead!  It's all the rage on instagram at the moment, but I think people have forgotten that contouring is not meant to make women look like drag-queens!!! It's meant to softly and subtly sculpt the face… which this Charlotte Tilbury product definitely achieves!  The subtle pearl also creates a lovely bronzing effect for that sun-kissed look!  But remember – less is more!

The highlighter is delicious!!! It has a golden base that flatters most skin tones.  The Light reflective technology captures the light and gives a luminous complexion.  And as you can see from the video, it can be used to highlight not just the face, but the decolletage and parts of the body like the arms. 


I absolutely love this product and I think everyone needs it!!!!

bronzeglow bronze2

Rebekah Foxe

Makeup Artistry by Rebekah

www.makeupbyrebekah.com.au

Like me on Facebook

What do I apply first, foundation or concealer?

I get asked this question all the time – what do I apply first first, foundation or concealer? 

There are no real "rules" when it comes to makeup, and everyone does things differently.

I can only offer advice based on what MY preference is. 


Generally, if I have to colour correct, I will do that first (so correcting under eye darkness with a peachy corrector, for instance.  Or correcting redness with a green colour corrector).  I only do this when really necessary and use a small amount of product.

I will then apply the foundation all over the face (I tend to use at least two different coloured foundations on various areas of the face).

Then once the foundation is applied I will then conceal ONLY WHERE NEEDED in a shade close to the natural skin colour.  Some people say to go one or two shades lighter than your natural colour, but I prefer to closely match the natural skin colour, and then brighten under the eye with an under eye brightening powder!  When applying concealer under the eye, make sure you bring it down into a V like the picture depicts below:

under eye

The problem I find when concealing before foundation, is that you are concealing areas where you probably won't need to because the foundation will do a good enough job!

Applying concealer AFTER foundation means you are applying less product, ( saving you money AND you're avoiding excess makeup or a cake face!)

My favourite concealers at the moment include the M.A.C Pro Longwear Concealer (pictured below).  The M.A.C. Select Cover concealers are also very good:

mac concealer

I also really like the It Cosmetics Bye Bye Under Eye (pictured below).  The trick is to use the TINIEST amount, however, and to lightly set with a powder:

IT-COSMETICS-BYE-BYEYou can purchase these from PM STUDIO  for $39.

My favourite way of applying concealer is with a small fluffy brush like the  Real Techniques Deluxe Crease Brush (in the purple eye set) – second from the left, pictured below :

real-techniques-starter-set-1

This brush is great for applying concealer under the eye area.  A flat brush like the "accent brush" is great for patting concealer onto pesky pimples and blemishes.

By buffing the concealer into the skin as opposed to patting it over the top, it creates a more natural finish! Let's face it, no one wants to have an obviously concealed under eye area!

INSERT BAD CELEBRITY UNDER EYE CONCEALER PHOTO…. (sorry Rihanna!)

makeup-mistakes-rihanna-tonybarsonwi450

Once the concealer is lightly buffed in, I then set it with a light powder like Ben Nye setting powder, and then an under eye brightener like the Laura Mercier Under Eye Brightening Powder.

My favourite brush for setting powders under the eye is hands down the Real Techniques Setting Brush, pictured below:

real techniques setting brush

You can buy all the Real Techniques brushes from PRICELINE

So in a nutshell, foundation first followed by small amounts of concealer buffed into the skin (or patted onto blemishes) and set with powder!

Easy!


Robyn

If you have any questions you want to ask me, please contact me via email at info@makeupbyrebekah.com.au or via my facebook page at https://www.facebook.com/MakeupArtistryByRebekah

I am happy to answer any beauty and makeup questions you may have.


Rebekah Foxe

Makeup Artistry by Rebekah

http://makeupbyrebekah.com.au

Real wedding: Kara and Brett – Sydney – 29 March 2014

I had the absolute pleasure of being the makeup artist for Kara's wedding back in March of this year.  Kara was the sweetest young lady, and we hit it off from the moment we met.  When Kara told me she was getting married in an old dance studio, and walking to the reception with her guests I knew this wedding would be unconventional and unique.  These photographs from Lucy Leonardi really capture the rustic charm of this wedding, the beauty of this couple and the love they share.

Congratulations Kara and Brett!

Below, Kara talks about the vision for her wedding, and writes about various Sydney wedding suppliers she used, and her experiences with them.

The vision

When we begun planning our wedding, I started to wish I’d been one of those girls who had been planning my dream day since age five. I had no idea what I wanted! But it all unfolded perfectly with a feel that was just right for us. I would describe it as a modern-vintage garden soiree with a few DIY rustic touches.

Make-up

Choosing the right make-up artist was one of the most important decisions for me. Beautiful make-up can make you feel confident and amazing, but the opposite is true when you feel it’s not right. I wear a full face of make-up almost every day, but I remember forgetting to put mascara on one day when I was going to an event – instead of enjoying myself I felt really self-conscious (and it was only a bit of mascara missing!) I definitely didn’t want to feel like that on my wedding day! I also wanted to look like me – just a little more glamorous!

I am so grateful to the friend who recommended Rebekah. In great frustration I had been telling her of the first trial I had which was a less than positive experience. Meeting Rebekah put all my worries at ease. She asked questions about our wedding, about me, listened to everything and talked through some ideas so she could work my make-up to suit me. We tried a few small variations of lip colour and intensity of eye make-up so it was just right. She was patient and made me feel extremely comfortable and confident in her ability. And above all – I loved my make-up.

kara3.jpg

On our wedding day she was exactly the kind of person you need in a room – calm, relaxed, warm-spirited. She turned up on time and absolutely professional – she’s also a perfectionist! My Mum and two bridesmaids all whispered separately to me on the day “wow, she’s really good!”

Kara1.jpg

During my trial I had explained to Rebekah that we would be walking over a kilometre from our ceremony to our reception venue and I was worried about my make-up sweating and coming off. I had nothing to worry about – it lasted to the end of the night and it still looked great.

I cannot recommend Rebekah enough – she is so talented, such a professional and a truly lovely person to be around!

Kara2.jpg

Wedding dress

For my wedding dress I wanted something romantic, feminine, a little bit vintage and a little bit elegant. After trying on a few dresses I also realised I didn’t feel comfortable in anything that sparkled too much, or was too full in the skirt – it just wasn’t me! I went for a lace, slimline gown with a chapel trail and a waist belt by Sottero & Midgley, purchased from Abbey Bridal. Not only did it suit my personality and style, it also suited the garden wedding venue. Abby Bridal an extensive collection with something for everyone at prices that won’t blow the budget – I’d recommend stopping in for a look around (although you need an appointment to try on the gowns).

kara8

kara7.jpg

Kara12

Location, location

Choosing a venue was one of our biggest challenges. I knew I wanted an outdoors element, and Brett’s only request (next to great music) was the option to select our own caterers. We really wanted the flexibility to choose food, beer and wine we liked. We also wanted somewhere fairly central and easy to get to, as a lot of our guests were flying in from interstate and overseas. The combination proved harder to find than we expected! But we came across Lion Gate Lodge in the Royal Botanic Gardens and immediately loved it. It was a blank canvas so we could do whatever we wanted style-wise, and it was surrounded by not only beautiful gardens, but also the city skyline.

Kara17

Our ceremony venue was a little unconventional – a ballroom dance studio in the St James Trust building, which we initially looked at it as an alternative to Lion Gate Lodge because I was worried about the possibility of rain. The minute we walked into the space though we were really taken by the enormous arching windows, high ceilings, lovely natural light and overall ambience, and decided we would get married there.

Kara10 Kara11

Our two venues were on opposite sides of Hyde Park and this worked perfectly for us. We led our guests from St James Trust Building through the park and into the Gardens on one of Sydney’s most beautiful walks, with a musical procession featuring many of our musician friends. We had our ‘formal’ photos along the way!

Kara13 Kara14 Kara15

Catering

We wanted a cocktail style wedding to give people the freedom to move around and mingle with others rather than spend half the night in one spot at a table, but we were very conscious of making sure everyone’s bellies were full with hearty wholesome food. We were extremely lucky to work with friends of ours from the Full Circle community. Full Circle takes a really special approach to food, and believes its something that should be shared and celebrated. They source and cook with fresh in season produce from local farmers and put a great deal of passion into work. Many of their days are spent organising festive food events, secret dinners and pop-up food experiences. We explained the concept of our wedding and type of food and experience we were after, and they agreed it was a good fit. We were absolutely blown away with what they came up with, the menu was divine and received compliments from every corner. I was really grateful for Brett’s insistence and persistence in being able to self cater so we could work with these guys – they really are amazing!

Kara16 Kara20

What else I loved

Next to my make-up, I absolutely loved my bouquets – Sevi from Lulu flora couldn’t have made them more perfect. To top it off they were hand delivered by her husband!

kara9 kara6.jpg

I also loved every moment with Brett, but his speech was particularly special – I don’t think there was a dry eye in the room (and my make-up managed to withstand it!).

Kara19

Kara18

We had the most wonderful, magical wedding day. I would be lying if I said planning a wedding is not crazy and stressful, but it sure is worth it! We had so much fun; and rare and special is the occasion that you get all of your most treasured friends and family in the same place at the same time; that was the greatest gift.

Suppliers:

Make-up: Makeup Artistry by Rebekah Foxe makeupbyrebekah.com.au

Hair: Sophia

Dress: Abbey Bridal (Sottero & Midgley) abbeybridal.com.au

Bridesmaid dresses: Review review-australia.com

Photography: Lucy Leonardi lucyleonardi.com

Bouquets & Boutonnieres: Lulu Flora luluflora.com.au

Ceremony venue: Step-up, St James Trust Building, Sydney http://www.stepupstudio.com.au

Reception venue: Lion Gate Lodge, Royal Botanic Gardens http://www.rbgsyd.nsw.gov.au

Catering: Full Circle fullcirclecommunity.com.au/

Wedding Cake: Miss Delish (my talented sister!)

Bomboniere – Cookie Queen Kitschn facebook.com/CookieQueenKitschn

Real wedding: Elisha and Craig – 15 March 2014

Elisha4I had the pleasure of doing the makeup for the lovely Elisha and her bridal party.  Elisha and her friends and family were such a pleasure to deal with, and I wish her and Craig all the best for their future together as husband and wife!

Elisha writes about her wedding, including her Sydney wedding suppliers:

MY FAIRYTALE WEDDING…..

Our theme and vision:
Choosing the theme for my Wedding was a little difficult. l wanted it to have some meaning that reflected who l am as a person.

l ended up choosing a 'Bling' theme, with a black and white colour theme as l thought all these three aspects would work well together. l wanted my wedding to be modern, romantic and elegant, so l went with fresh flower arrangements as the centrepieces for my tables. Along the front of the bridal table l had glass mirrored boxes filled with fresh cream and white flowers and l chose glass cylinders filled with water and floating tea light candles as my bridal backdrop, to create the romantic atmosphere l was after.

Elisha10 Elisha11  Elisha13


Why l chose Rebekah to do my makeup:

l chose Rebekah to be my bridal makeup artist as her work is natural yet beautiful. l didn't want to be a bride covered in thick makeup on my wedding day.  l wanted a more natural look, which Rebekah seemed to specialise in.

Rebekah is so professional and has a lovely personality, she knew exactly what l wanted from the start. I was so happy with my makeup trial, feeling absolutely beautiful at my Bridal shower.  I knew l had picked the perfect makeup artist for my upcoming special day.

Rebekah takes her time and doesn't make you feel rushed or hurried. She is very hygienic, which l think is very important. My mother and bridesmaids were just as happy with Rebekah as l was.  You could really tell Rebekah enjoys her job, and is so experienced in what she does.

l was truly blown away with my wedding makeup and felt like an absolute princess, just like I had dreamed of.
Elisha7

Elisha2  Elisha Elisha8Elisha3 Elisha1

Why l chose the venue:

My ceremony and wedding reception was at Doltone House- Jones Bay Wharf in the loft http://www.doltonehouse.com.au/doltone-house/choose-your-venue/jones-bay-wharf, which is a two story reception room.  The dance floor and bar are located downstairs, and the formal dining area is upstairs. Choosing the wedding venue was a very challenging task as we looked at so many beautiful places, but we wanted to have a wedding reception venue that was a little different and unique. When we saw our room at Doltone House for the first time, we looked at each other with a big smile and knew this was the room. The loft had a beautiful outdoor balcony with views of the Sydney harbour bridge in the background. We just fell in love with this venue !

Elisha14Elisha15

Elisha6  Elisha5


Decorating/flowers/bouquets/wedding cake/candy buffet:

l had only one supplier for all of this and that was "Bling Events" www.blingevents.com.au.

One thing l didn't want was to have to deal with lots of different suppliers.  Rather,  l wanted to deal with the one person, who knew my theme and taste and knew exactly what l wanted.

My bouquet featured white roses, phalenopsis orchids, and dusty miller, with a diamonte handle and bling sticks scattered in the bouquet.

For my centrepiece's l had preston bailey vases with real white floral arrangements on a mirrored plate with two tea light candles.

Dealing with Bling Events took the stress out of planning my big day without breaking the bank!!
Elisha12


List of our suppliers:
Makeup: Makeup Artistry By Rebekah www.makeupbyrebekah.com.au
Hair: Anastasia's Hair Design
Photography: Paeonia Wedding Photography and Filming www.paeonia.com.au
Venue: Doltone House- Jones Bay Wharf (Loft) http://www.doltonehouse.com.au/
Wedding dress: Two Birds Bridal www.twobirdsbridal.com.au
Flowers: Bling Events www.blingevents.com.au
Wedding Cake: Bling Events www.blingevents.com.au
Bridesmaid dresses: Peter Trends Bridal www.petertrends.com.au
Wedding Cars: Pure Limousines (Chrysler 300c) www.purelimo.com.au
Bridal Jewellery: Peep Toe
Photobooth: Bright Box Photo Booths www.brightboxphotobooths.com.au


Real Wedding: The wedding of Caroline and Emmanuel – 14 March 2014

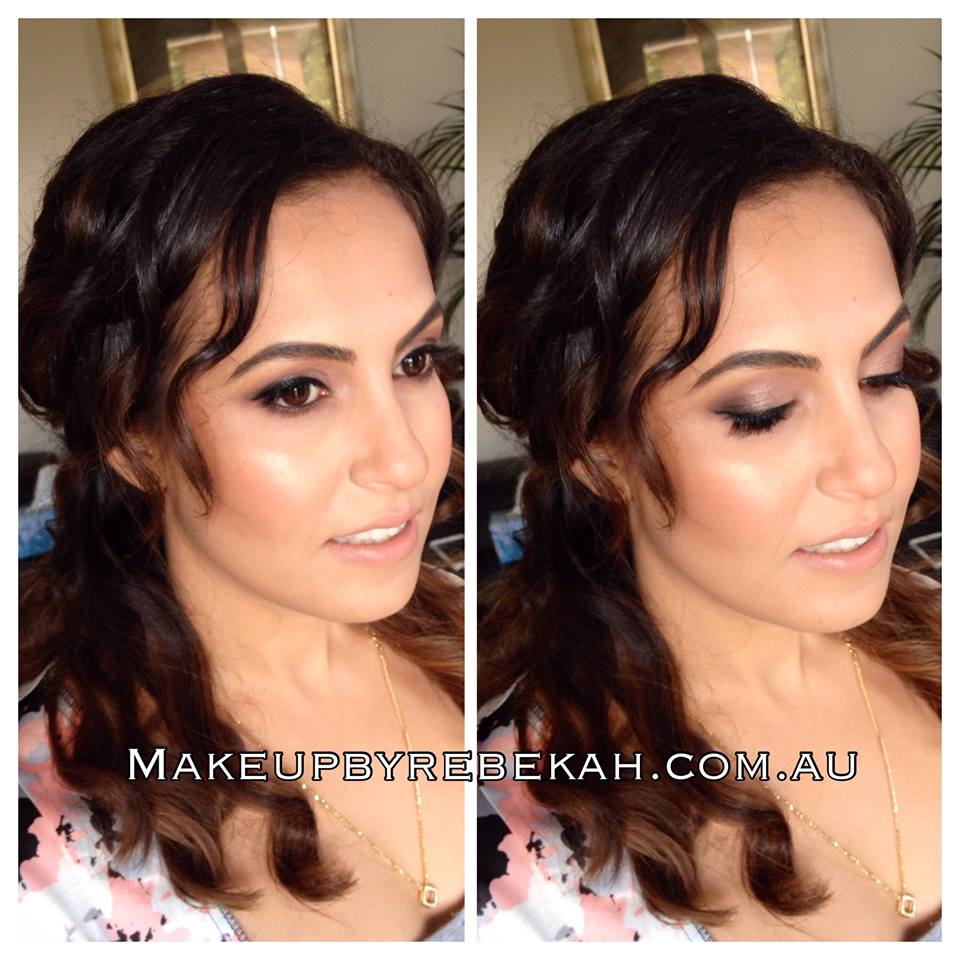
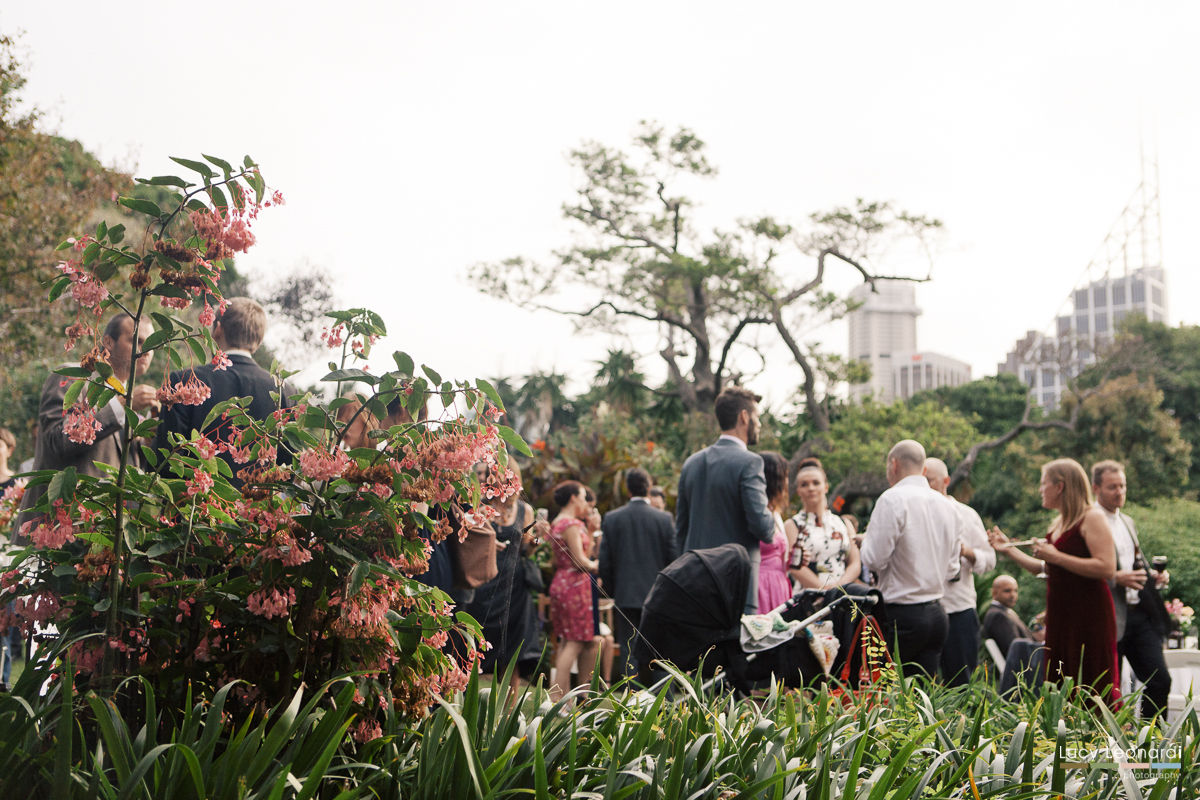
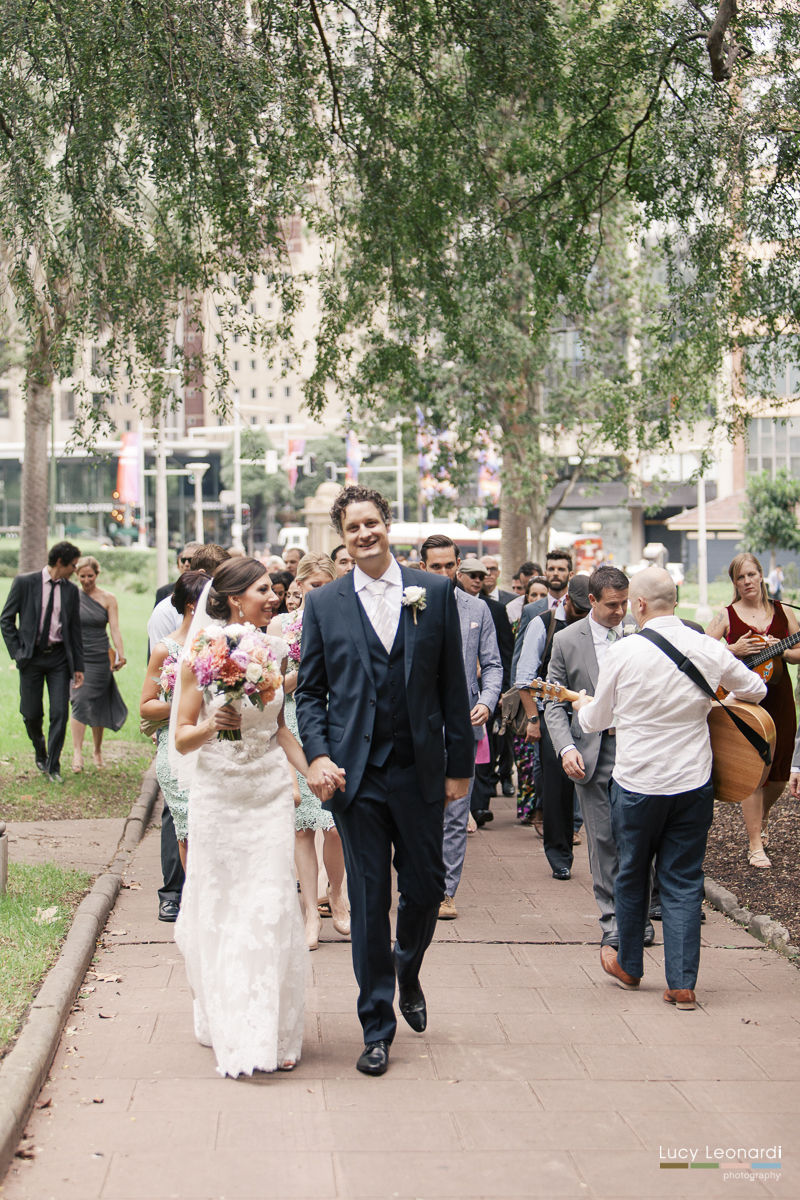
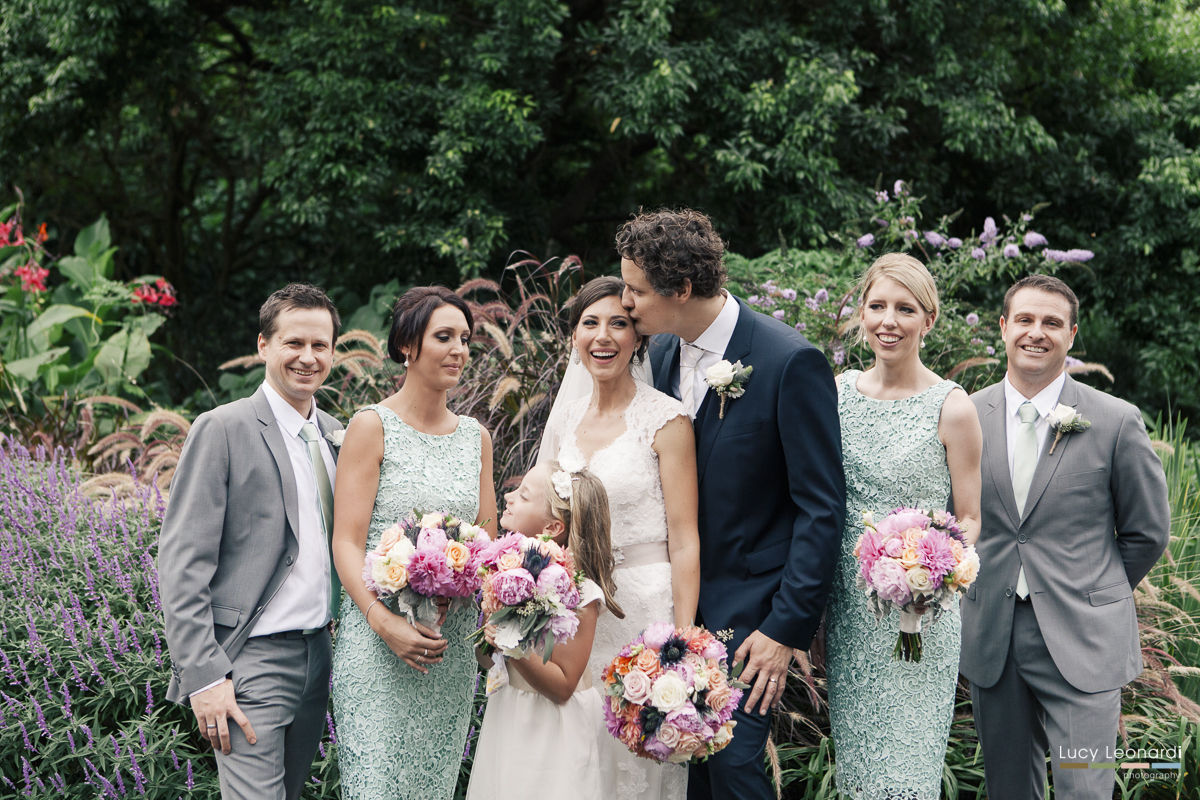
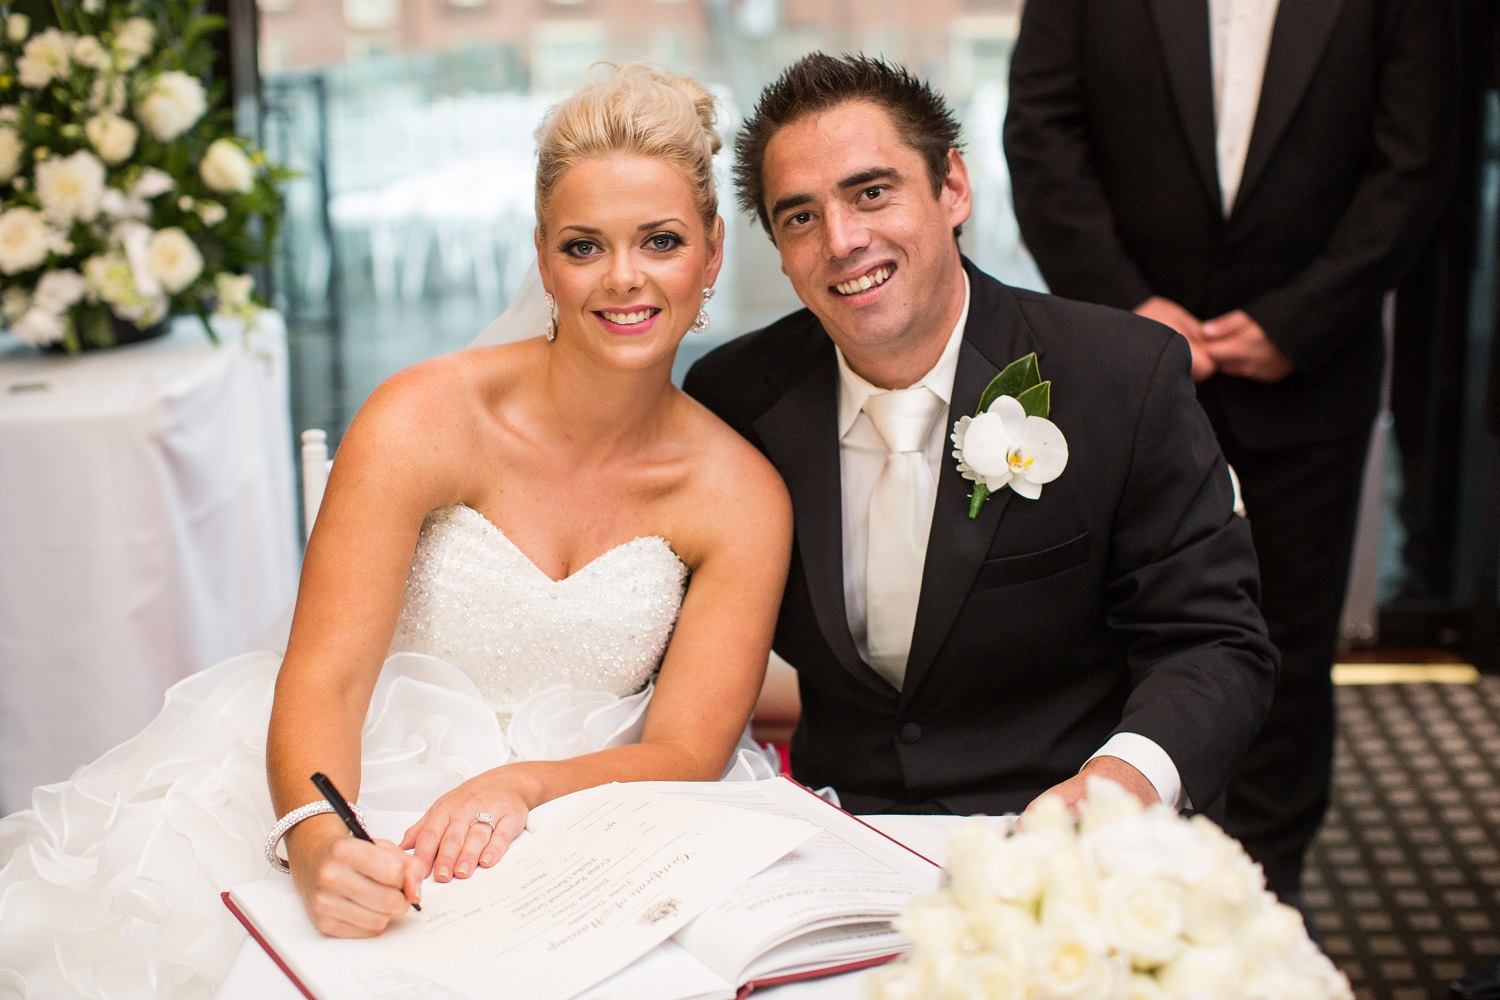
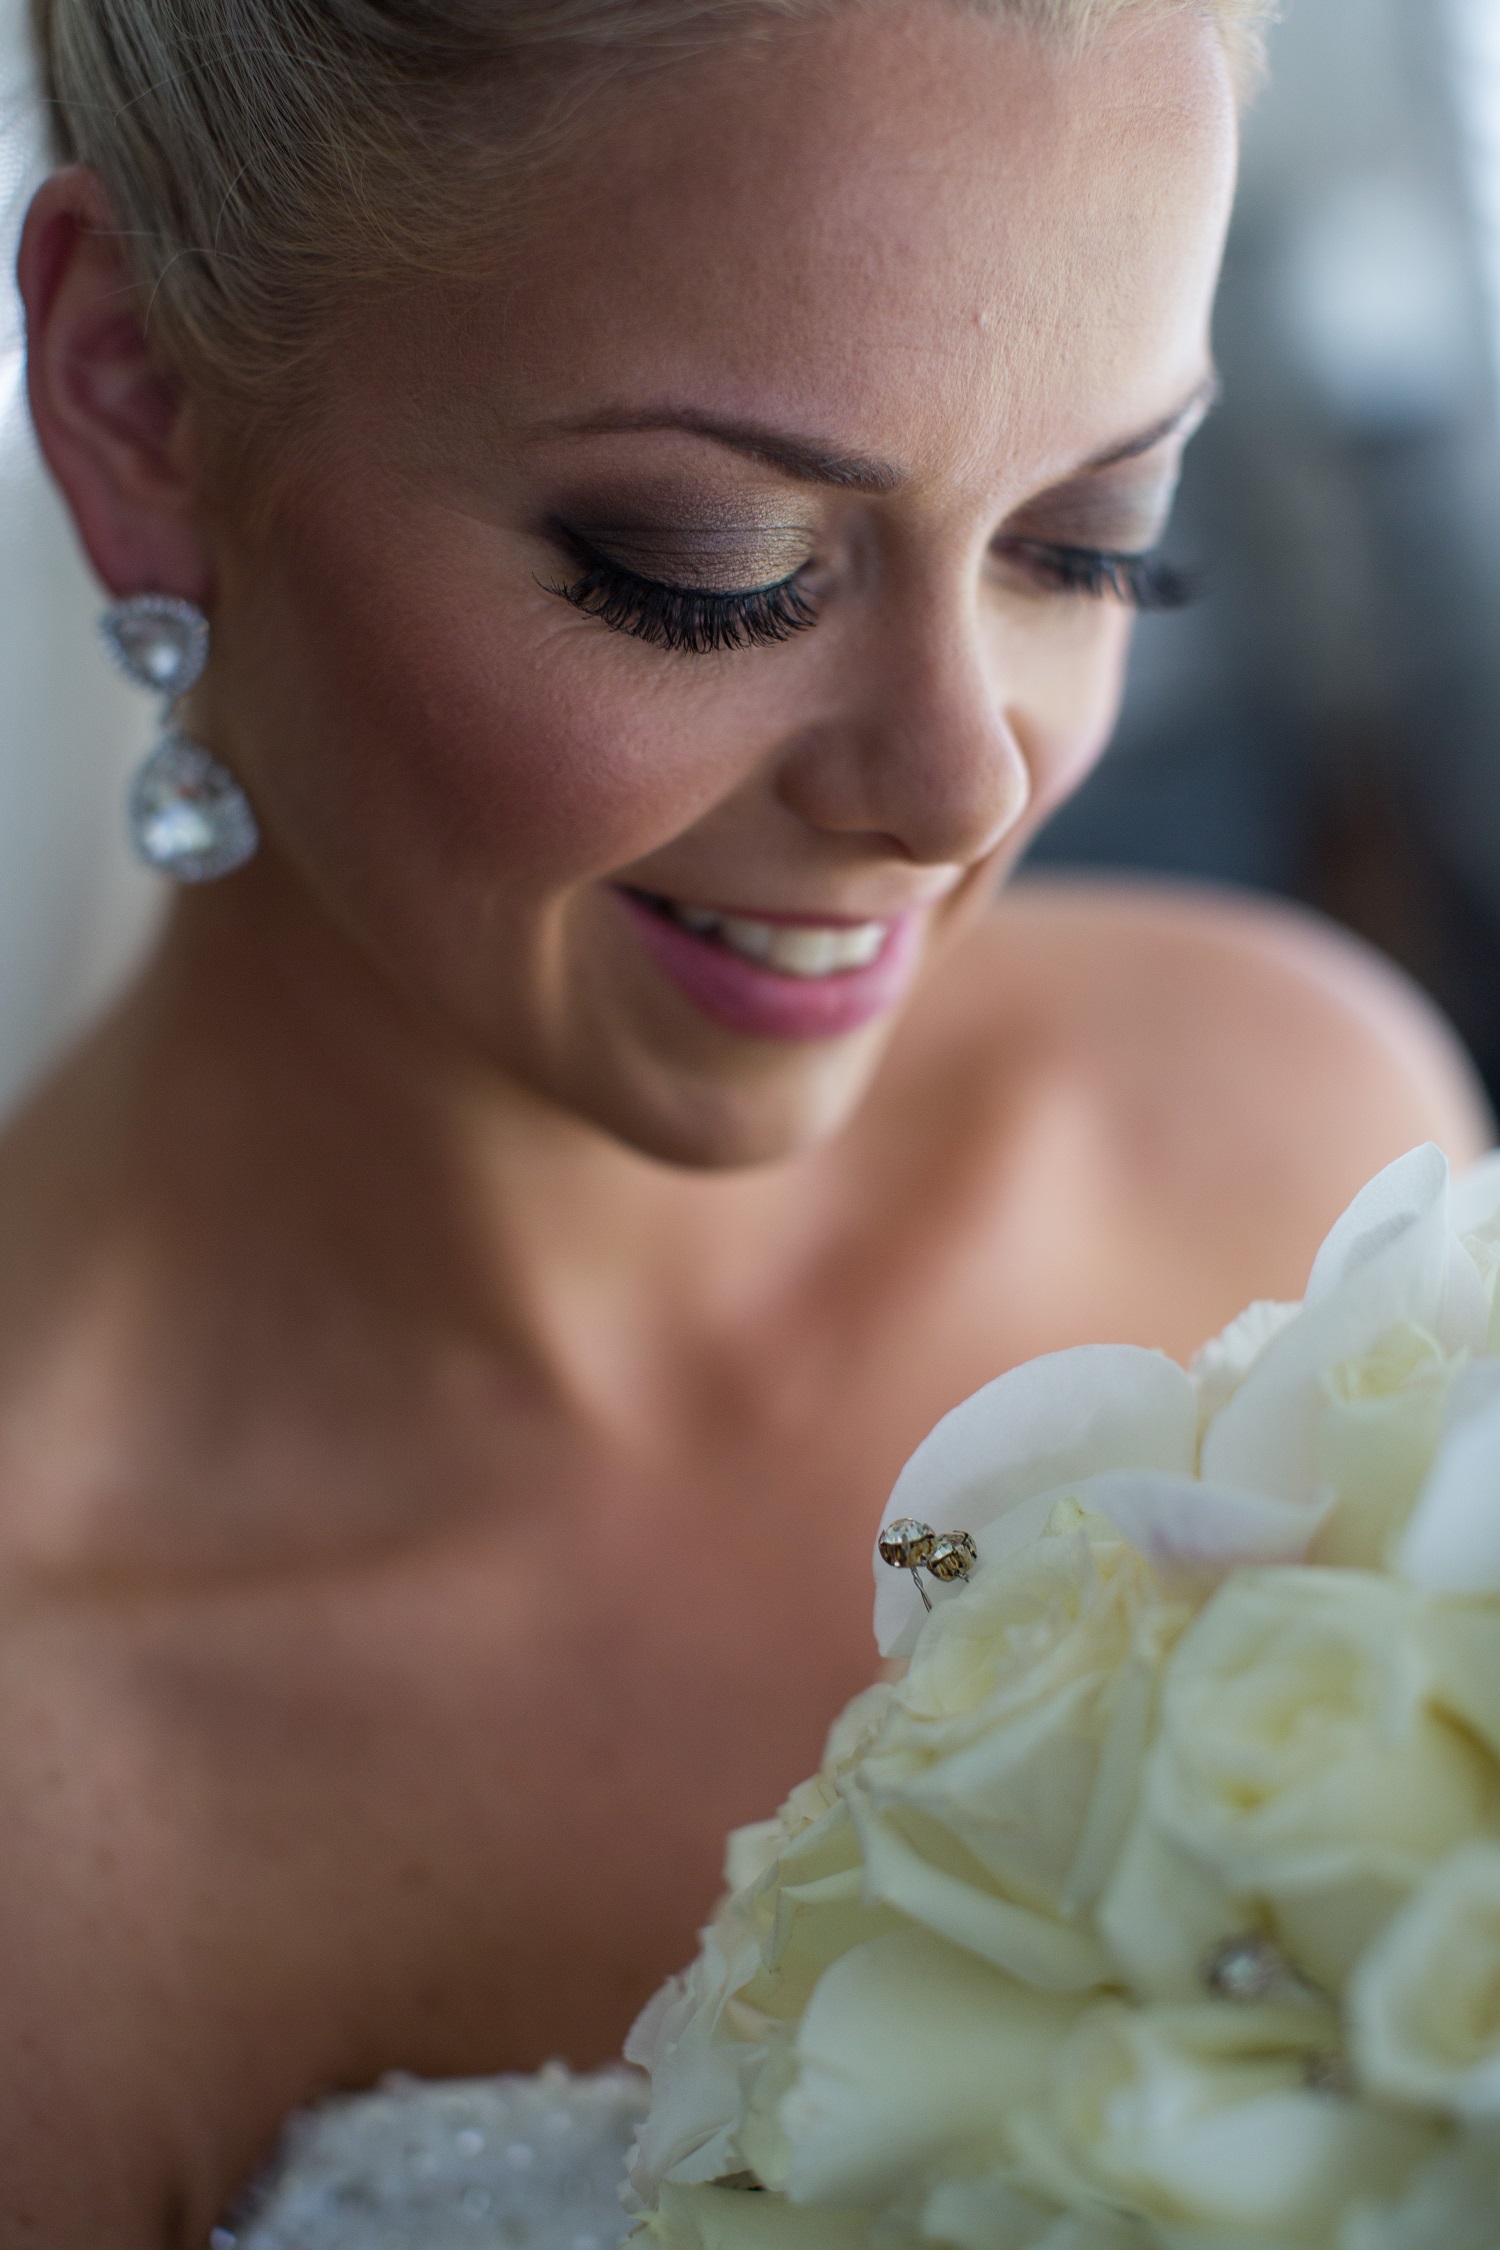
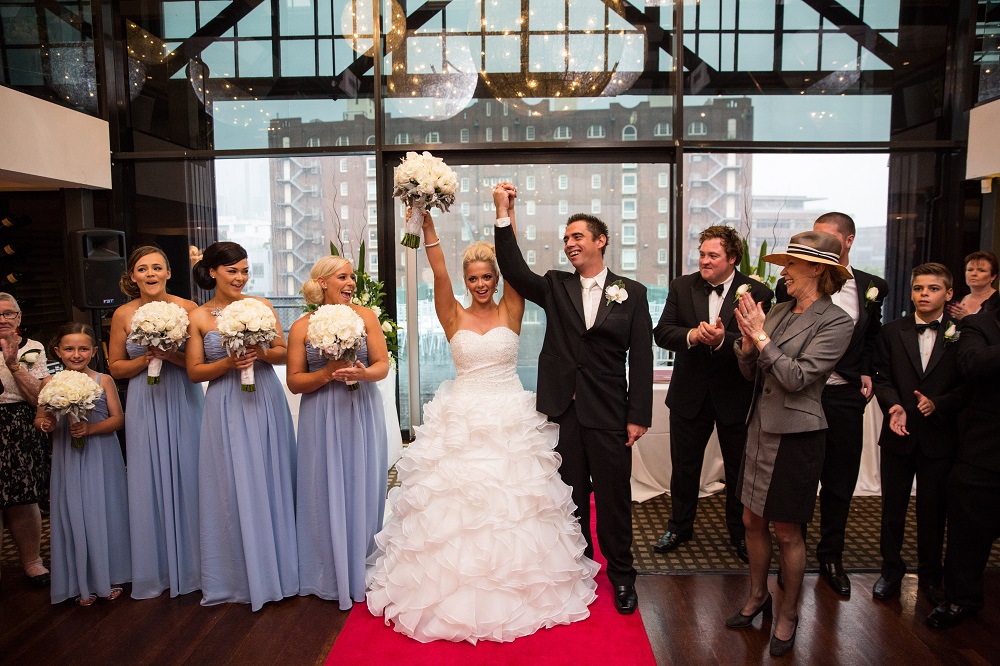
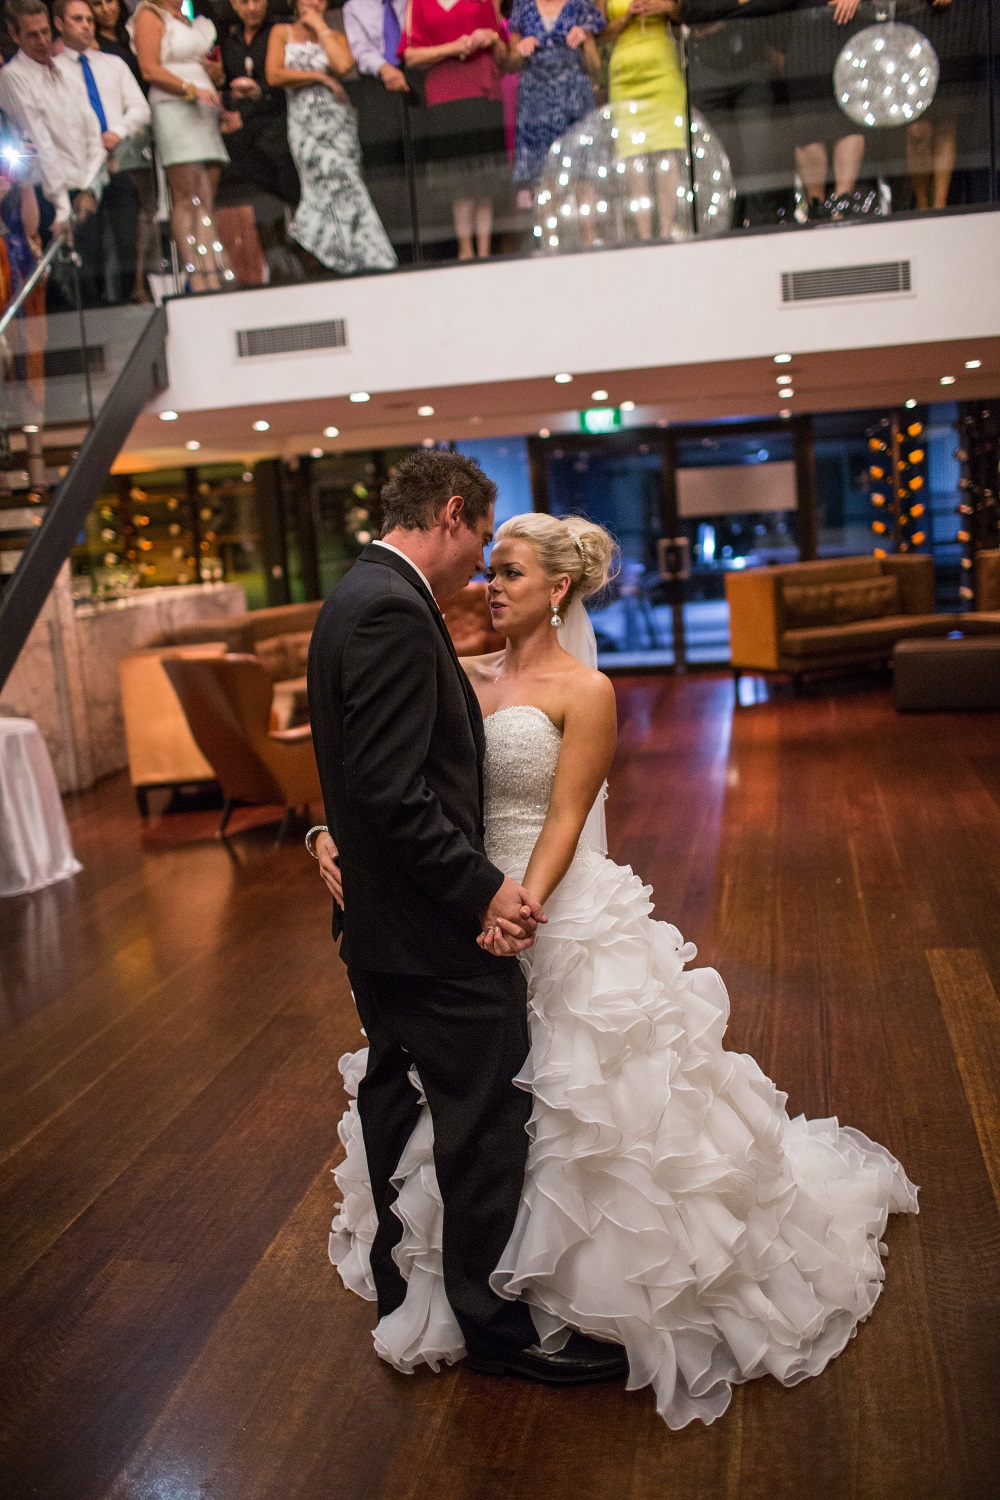
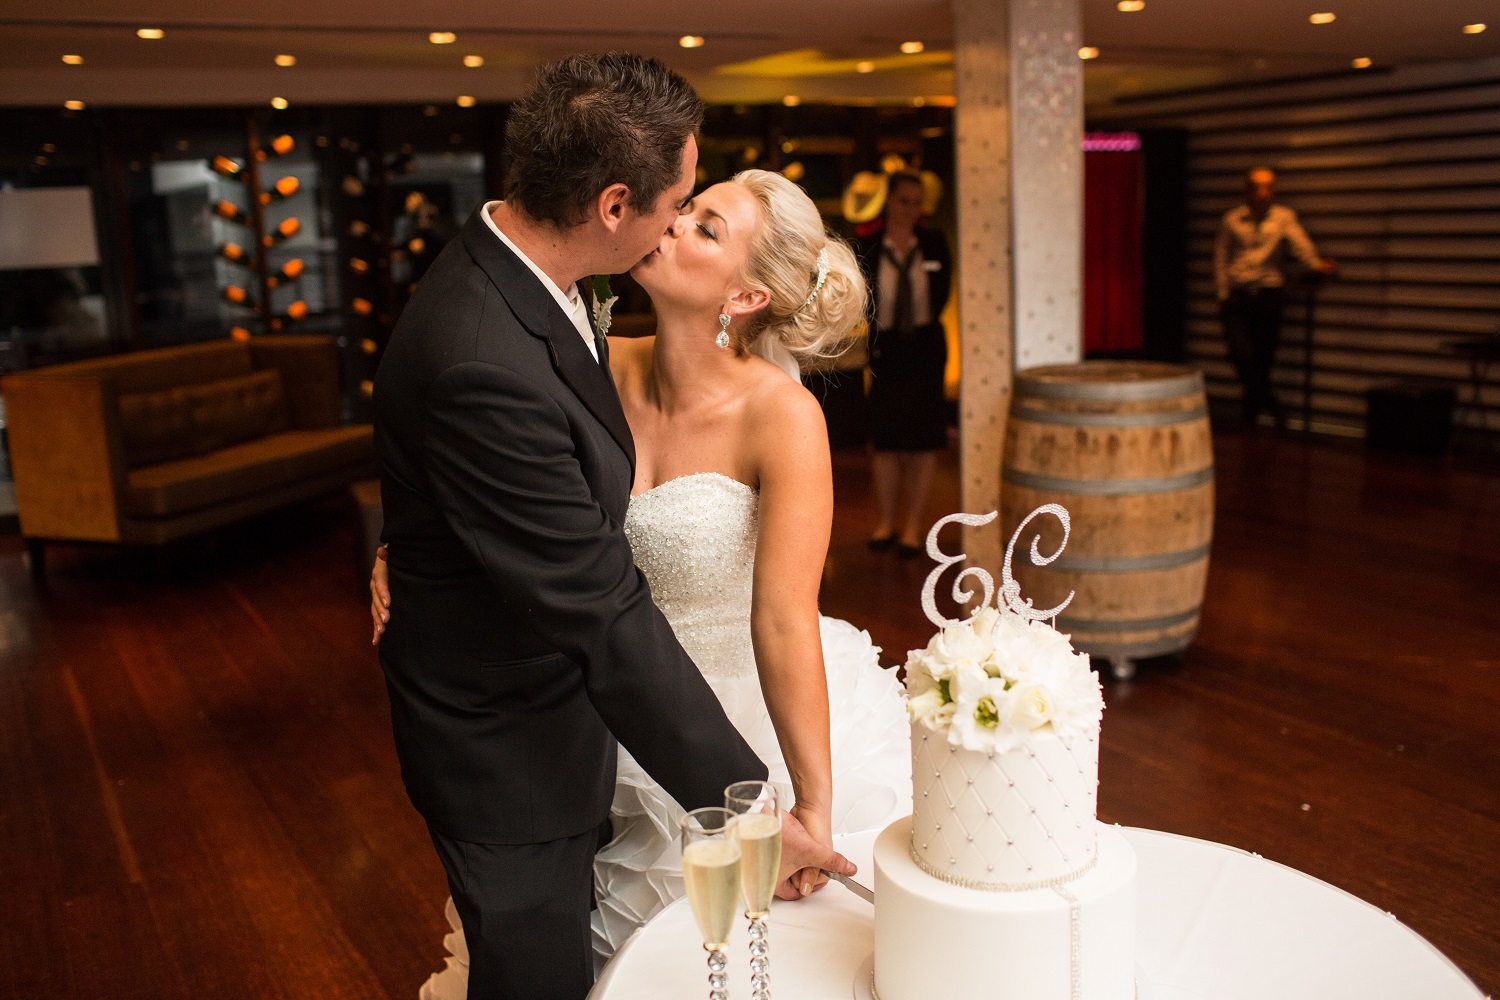
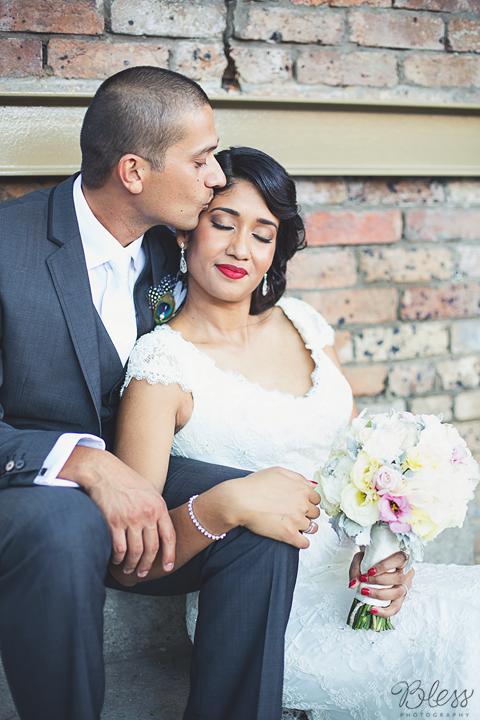
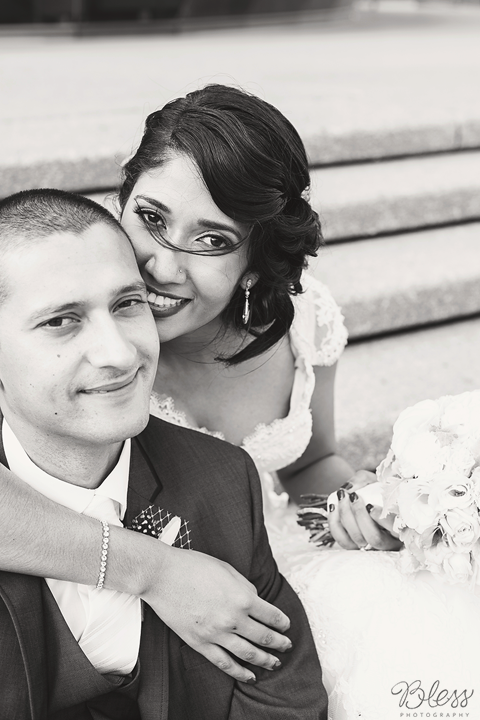
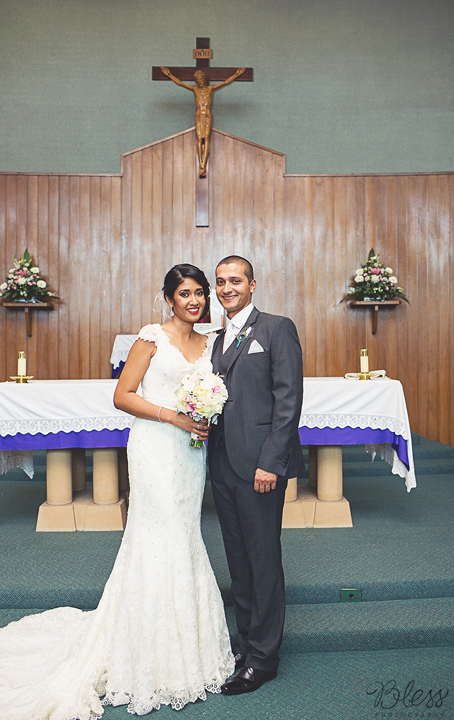
Meet the beautiful Caroline, who married Emmanuel on 14 March 2014 in Sydney.

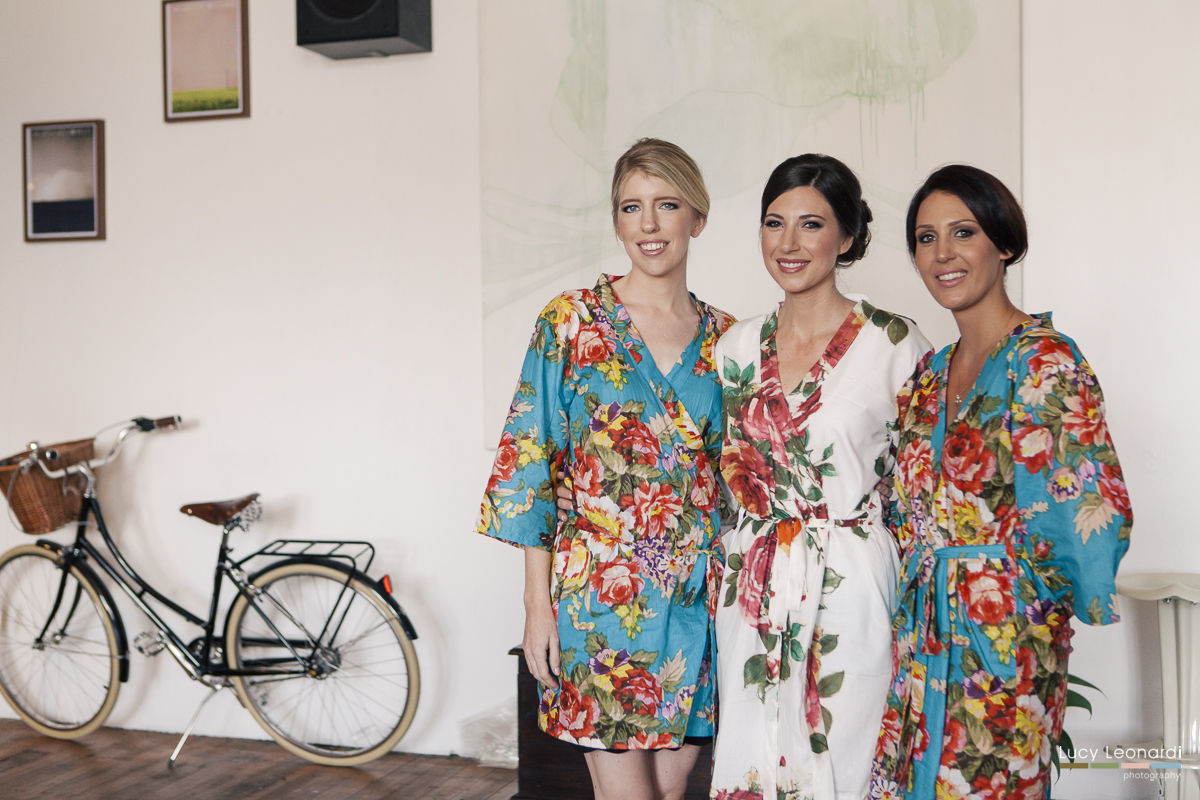
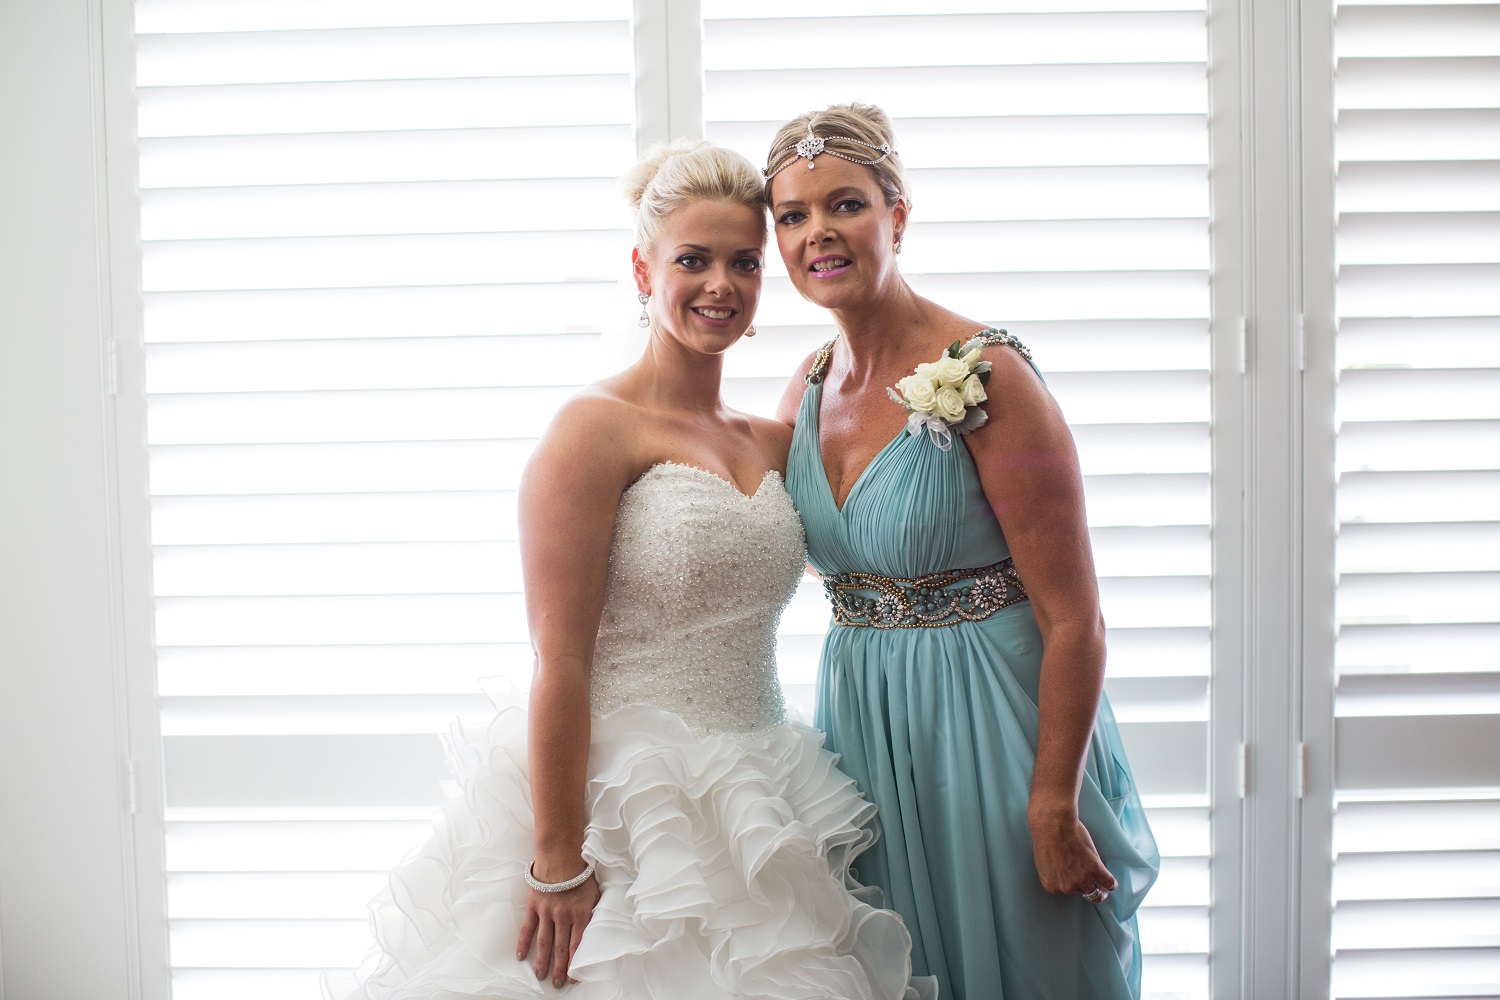
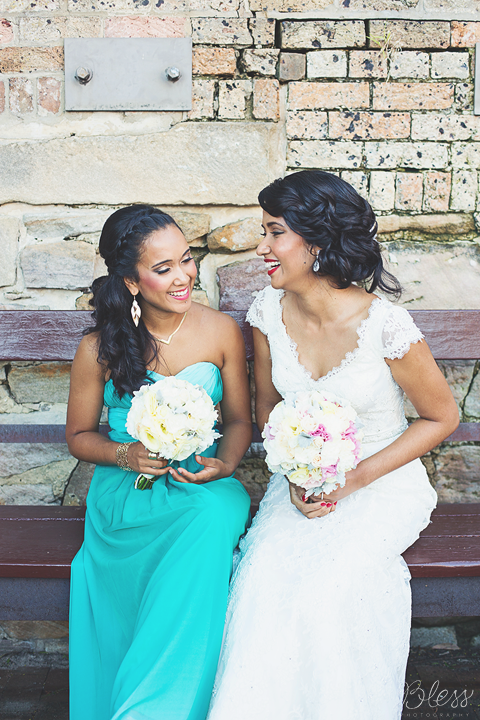
Caroline is an absolute sweetheart, who booked me in to do the makeup for herself, her bridesmaid, and mother.  Our mutual love for makeup made the whole experience so enjoyable. I wish Caroline and Emmanuel all the best in their lives together as wife and husband!

5

8

3

Caroline talks about her wedding suppliers – including myself.

Why did you choose Rebekah to do your makeup?

4

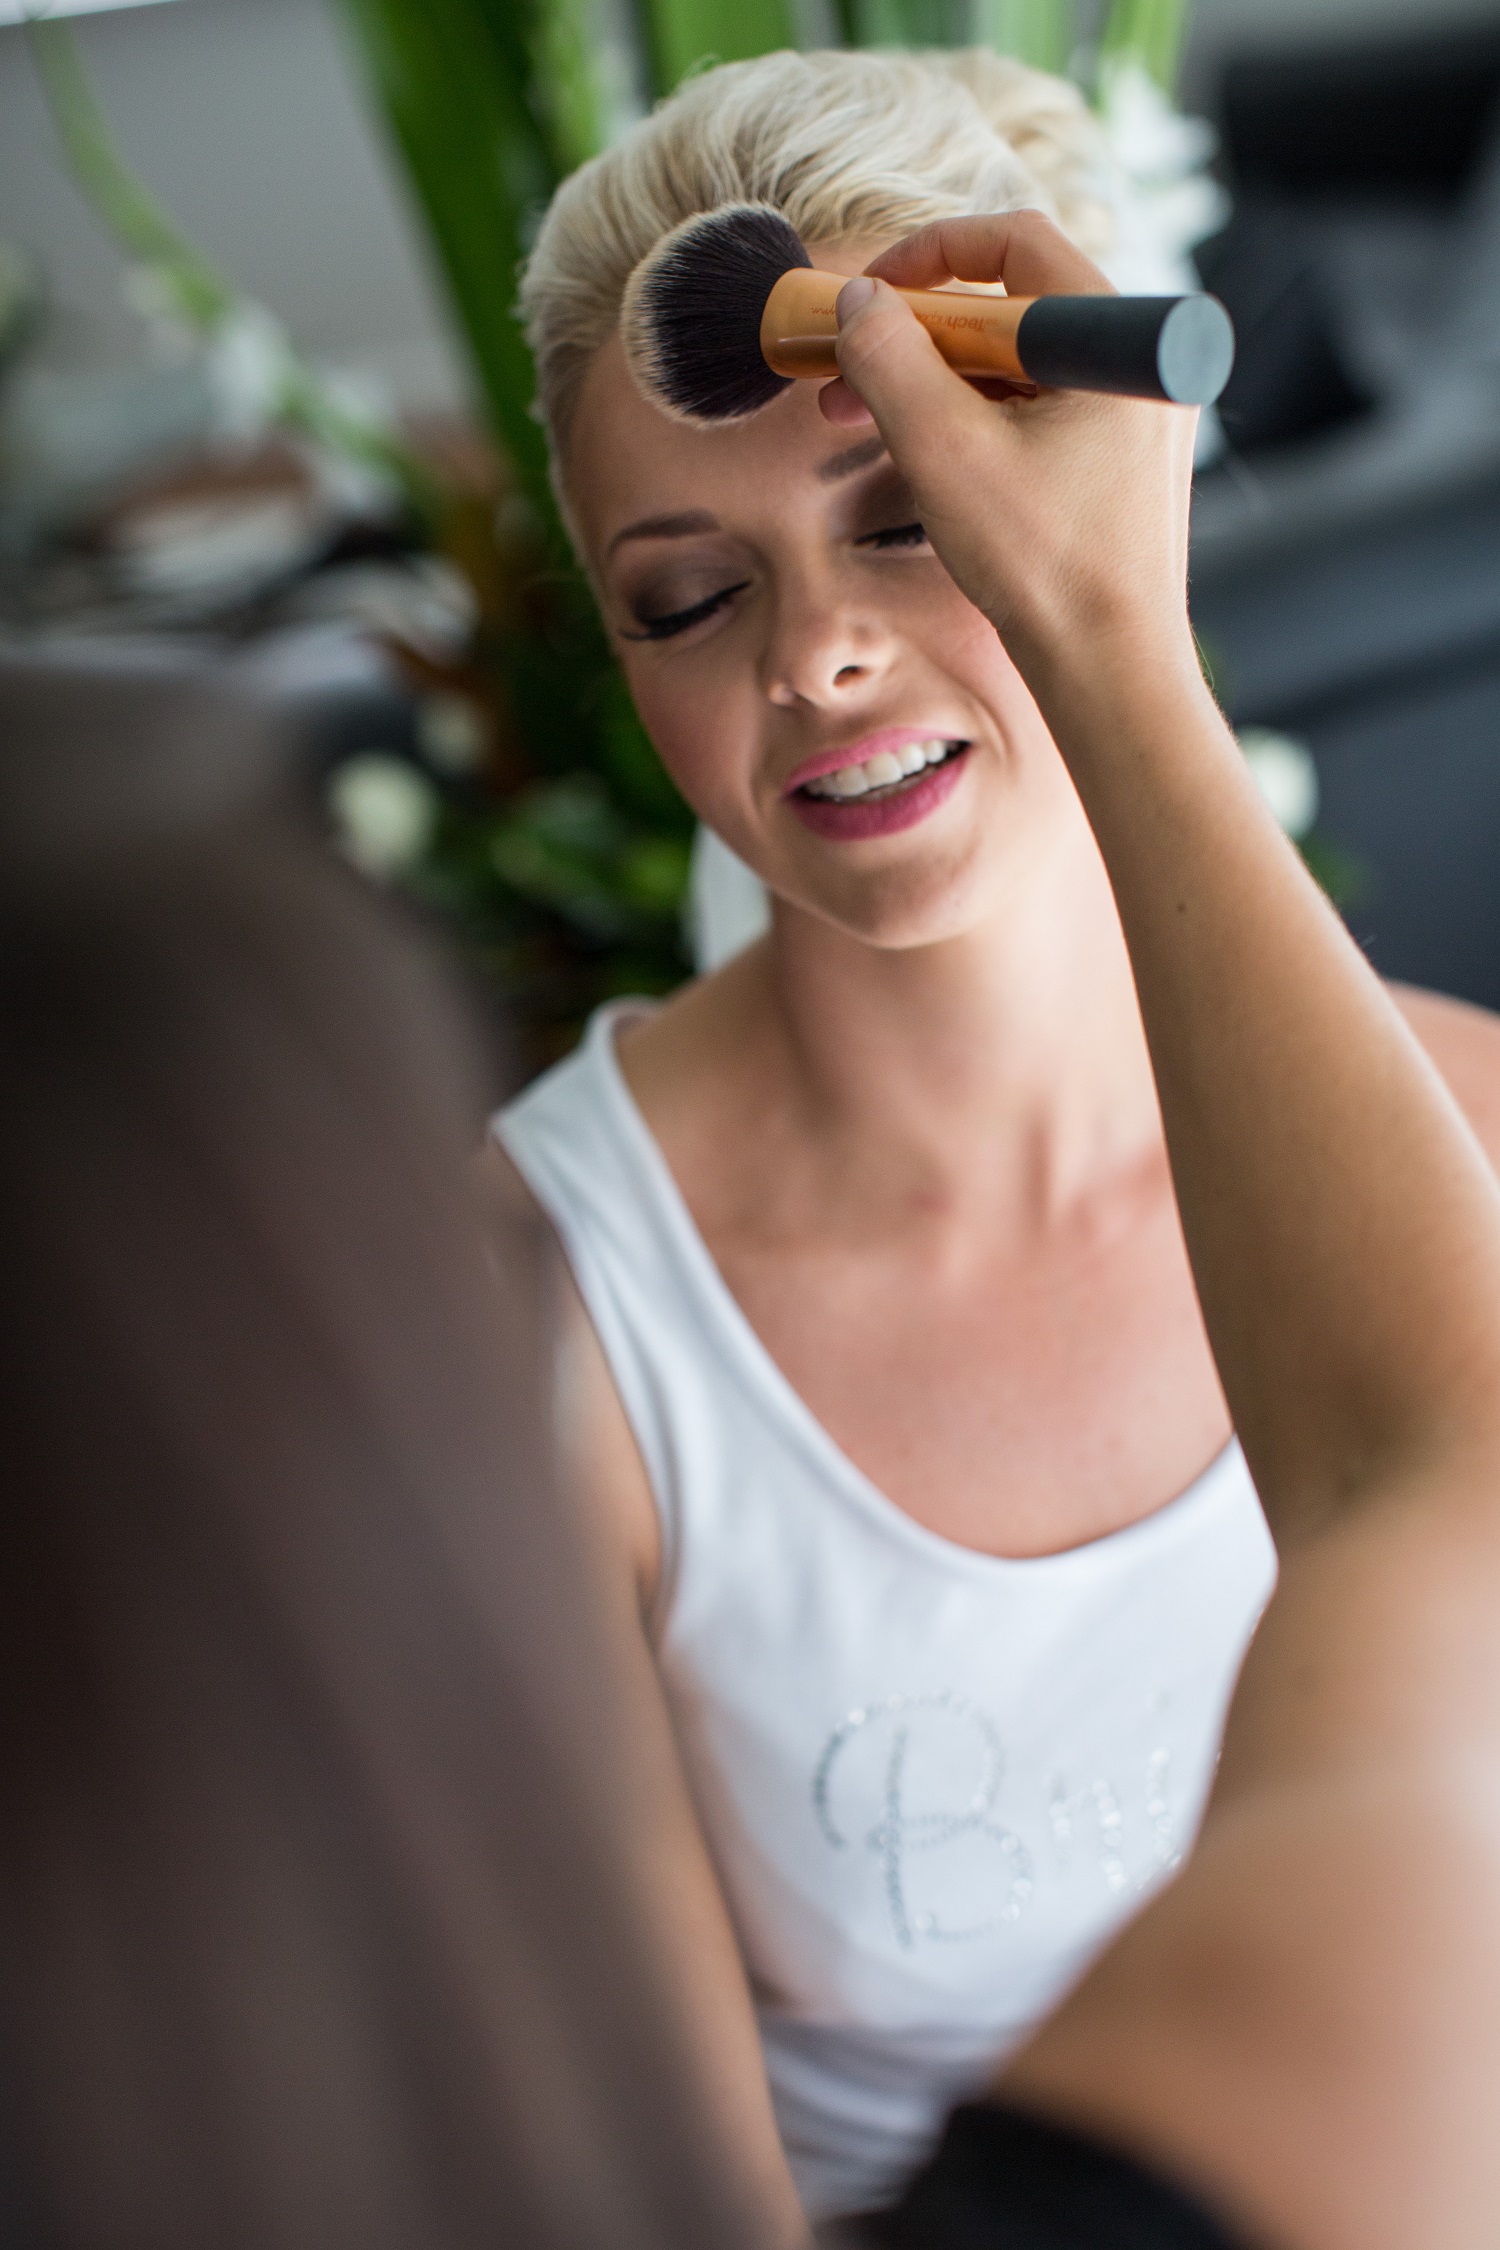
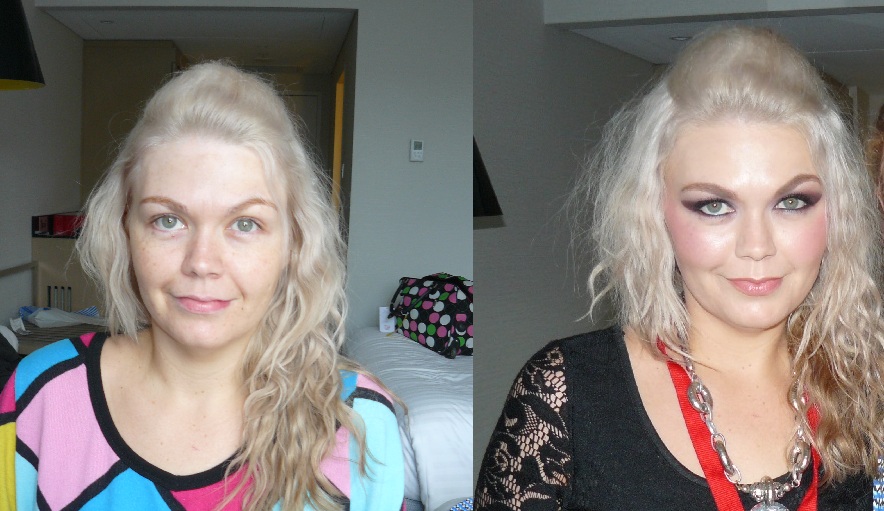
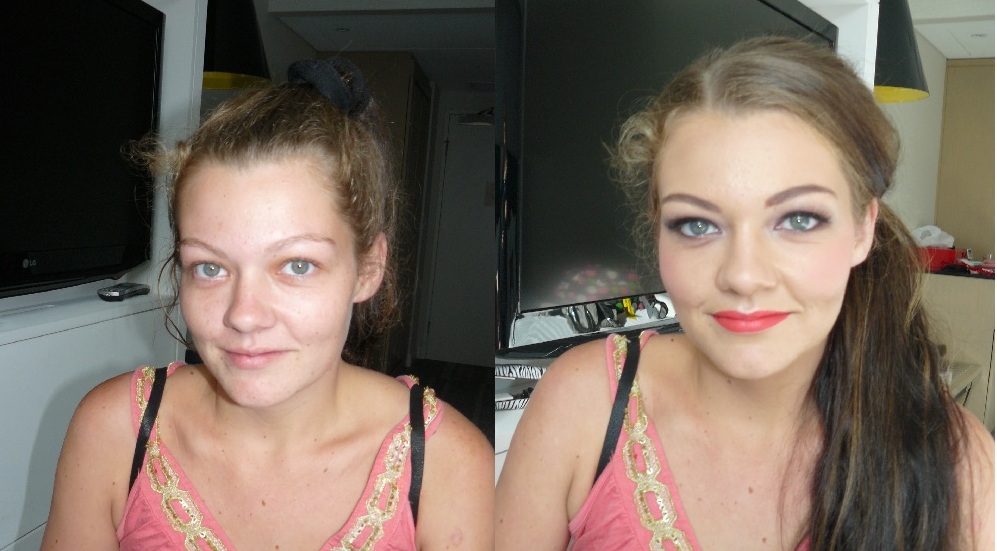
My makeup trial with Make-up Artistry by Rebekah was my fourth. It was a very frustrating process for me because I wasn't happy with any of my previous trials and they were costing me way too much money. I remember on the day I had my trial with Rebekah, I didn't even want to go because I was so discouraged and was convinced that once again, I wasn't going to be happy. But I'm so happy I forced myself to go!

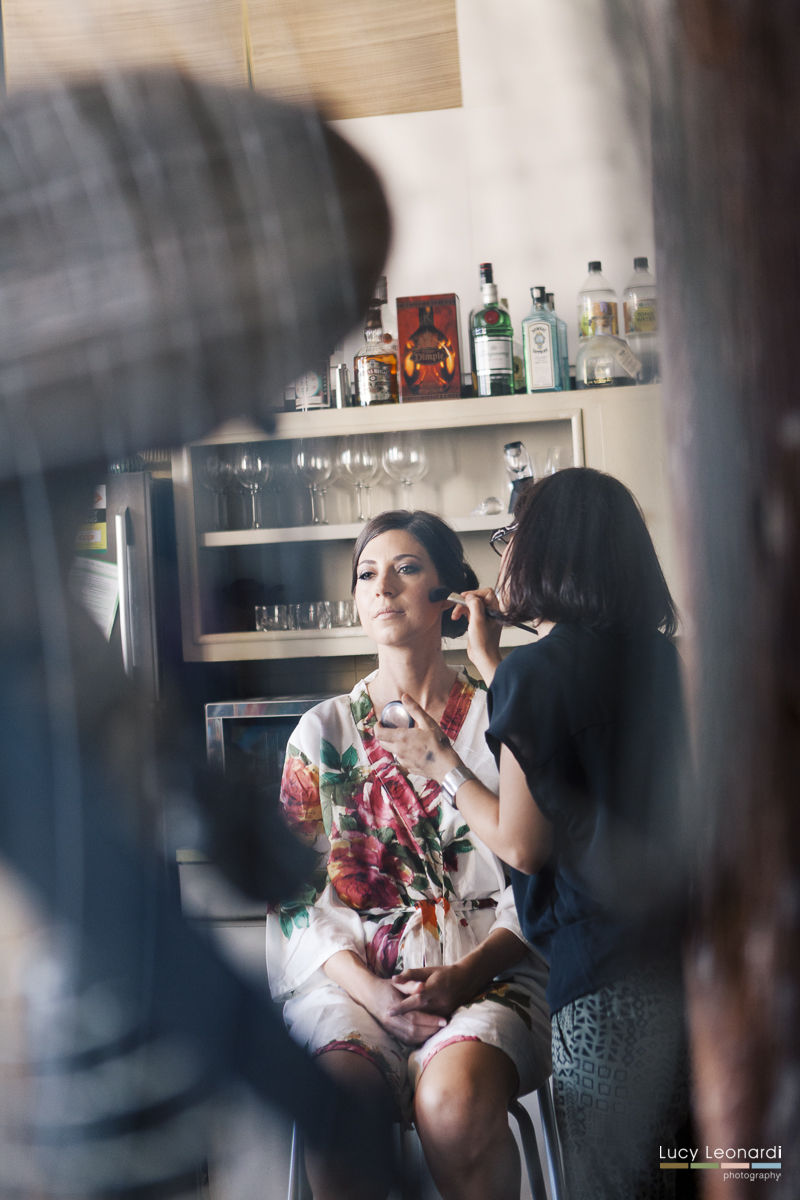
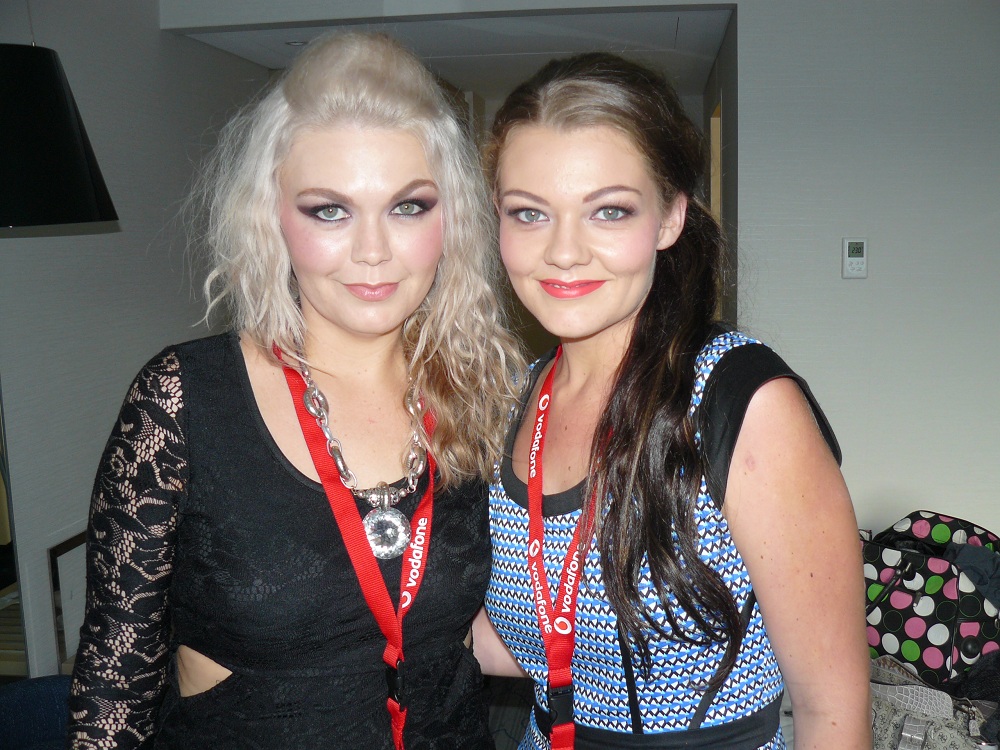
Rebekah had me at hello. Her professionalism is the first thing I noticed as I walked into her home studio. She was ready for me – all her make-up was beautifully laid out, professional lighting was up, there was soft background music playing, a glass of water for me, and beautiful flowers in the room. She made me feel very special and I knew right away that she takes her job very seriously. Rebekah is super friendly and made me feel very at ease.

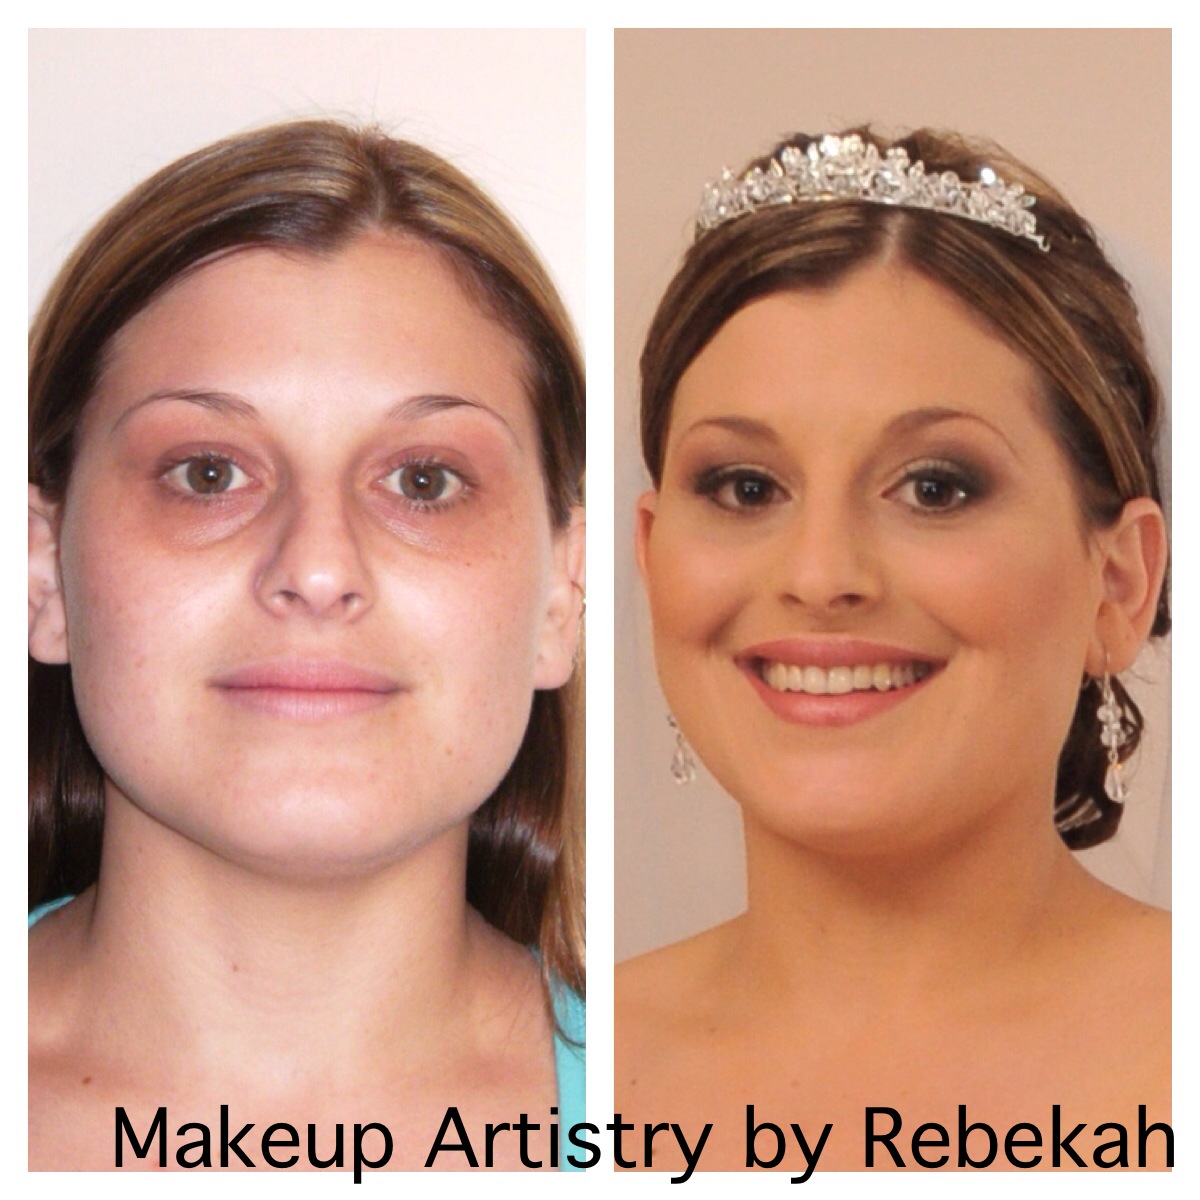
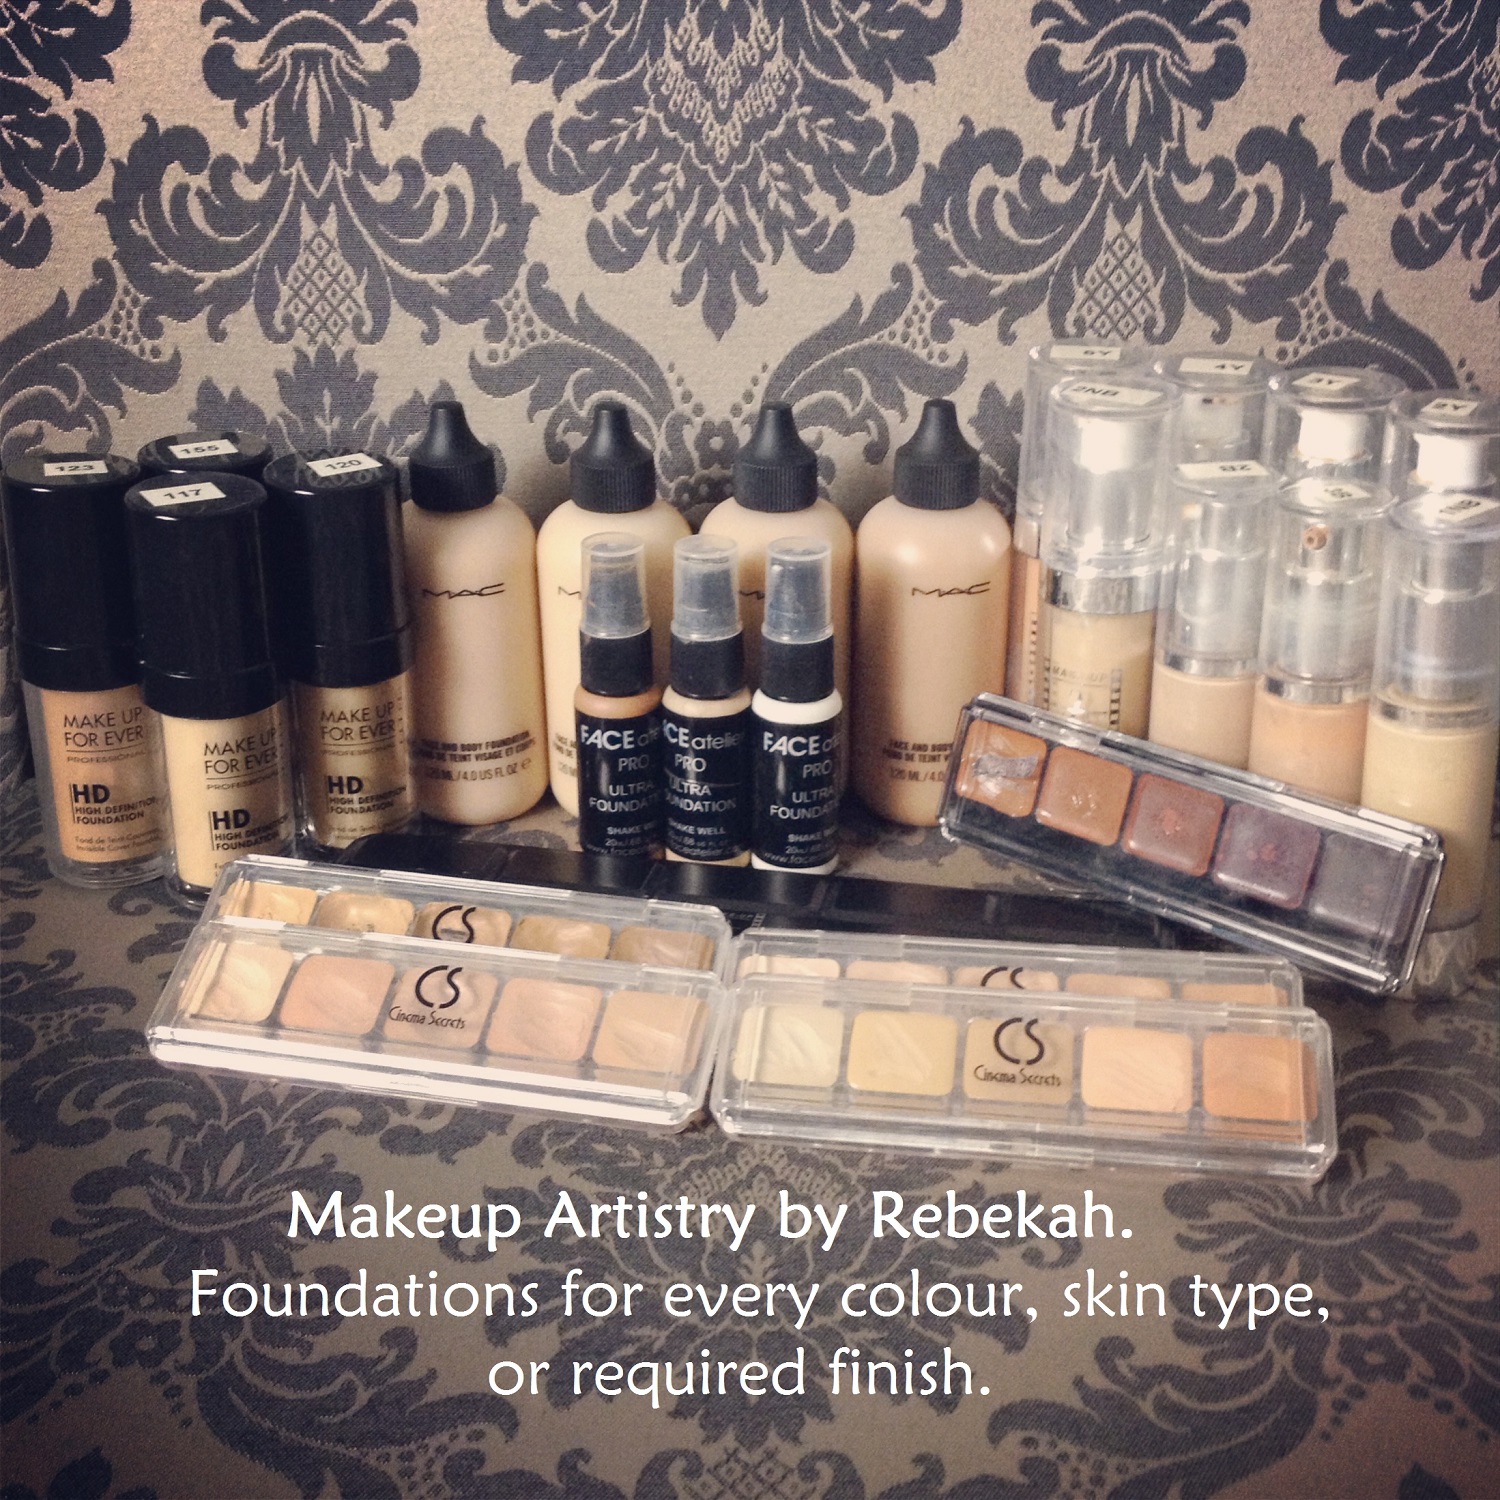
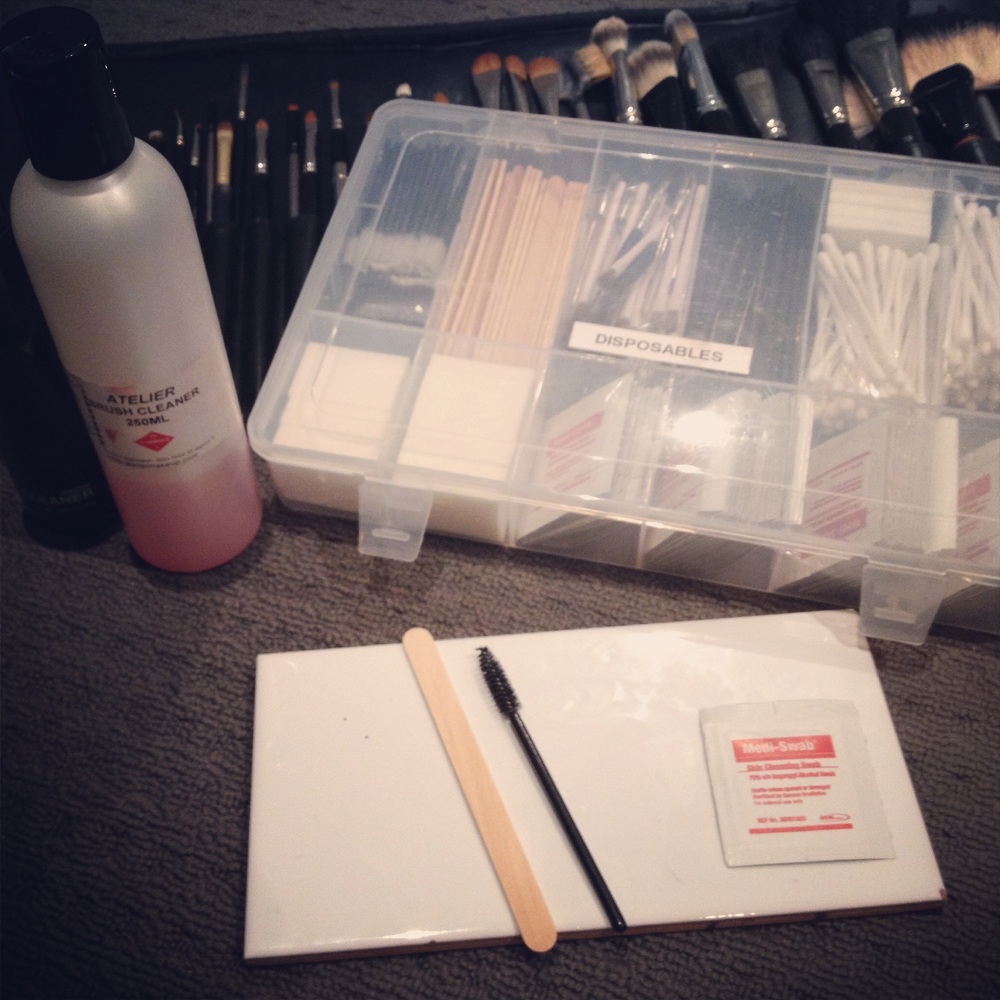
Although I didn't see my makeup until she completed my trial, my decision was already made. Rebekah takes her time, she makes sure she has the right colours to match your skin tone, her techniques and precision are very impressive and I love how hygienic she is. Her brushes are all fully cleaned and she never takes products out from the packaging and straight onto your skin. Instead she pours the products onto an immaculate, fully sanitised tile that she uses as her mixing palette. She also uses very high quality products.

I was blown away by the end result. Rebekah highlighted my best features and the make-up lasted the entire day. On the wedding day, Rebekah gave me the lipstick I ordered from her for touch-ups, but along with the lipstick were some mints, blotting papers, tissues, pins, all neatly packaged into a small organza pouch.  Her attention to detail is just out of this world!

I couldn't have chosen a better make up artist for one of the most important days of my life. It's not hard to tell how truly passionate Rebekah is about her job.

7

6

What was the theme and vision for your wedding?

12

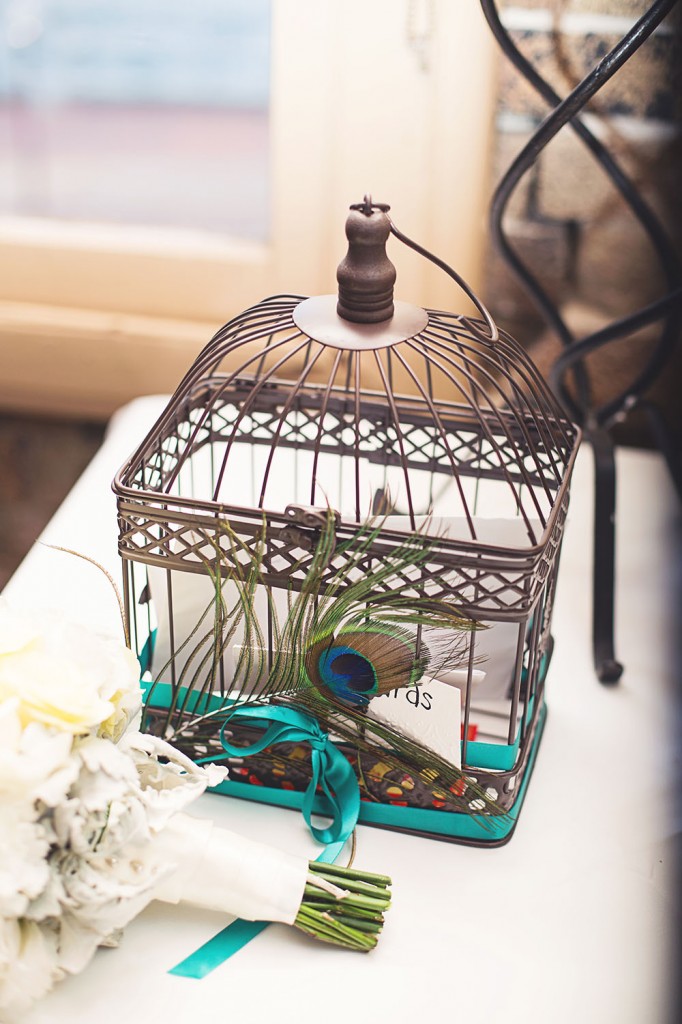
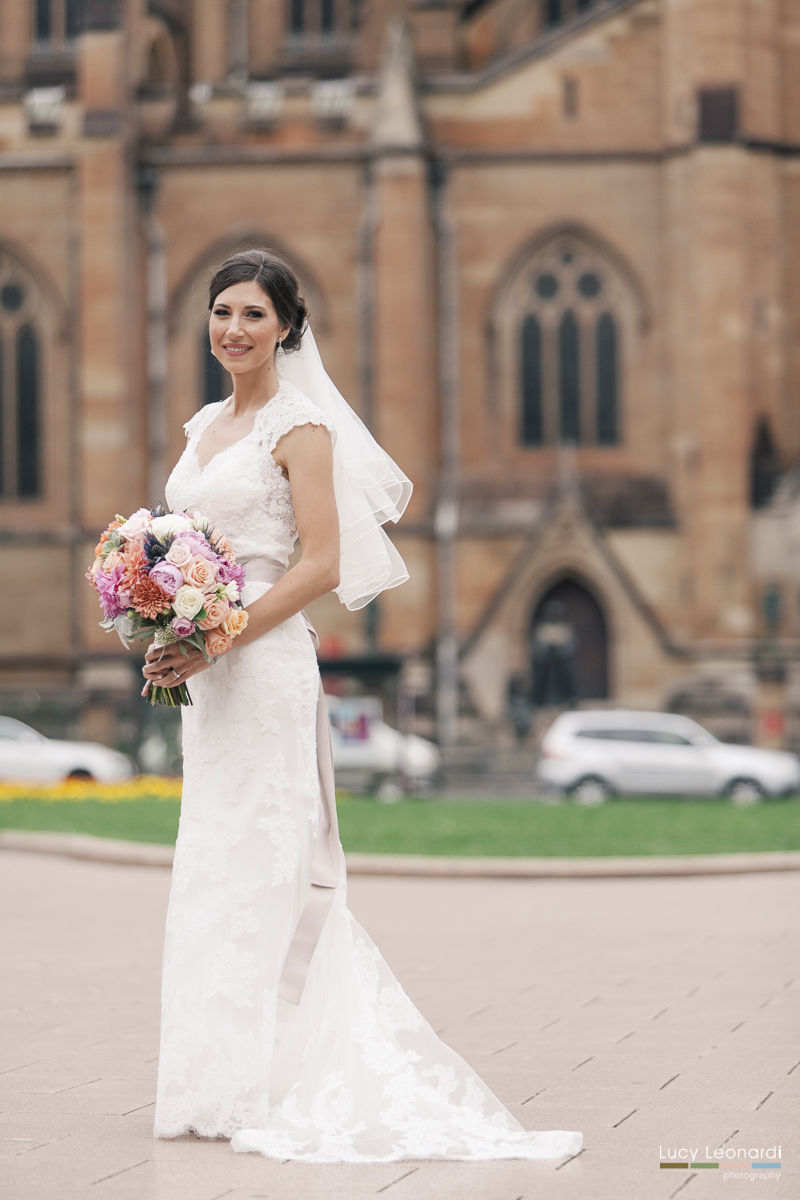
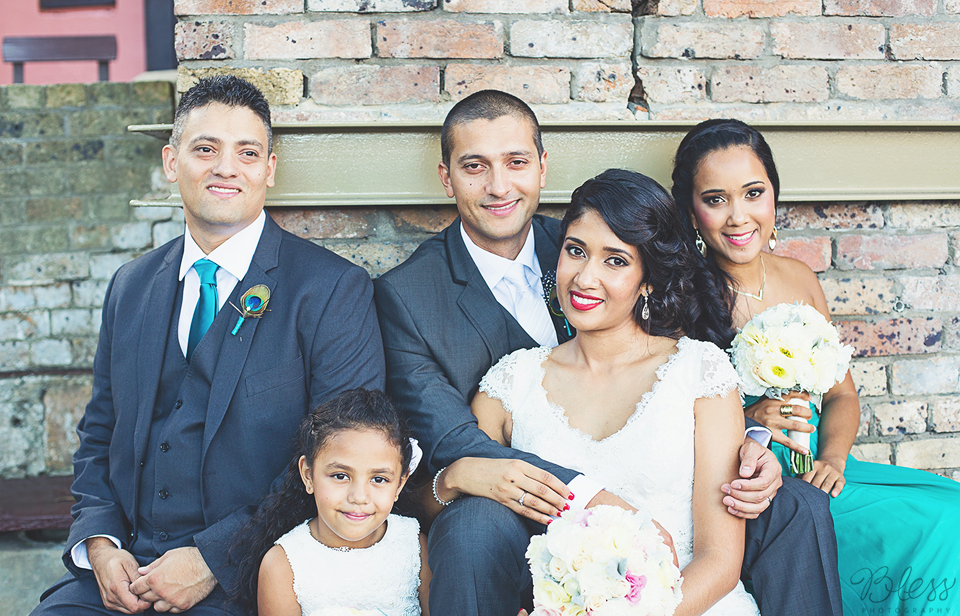
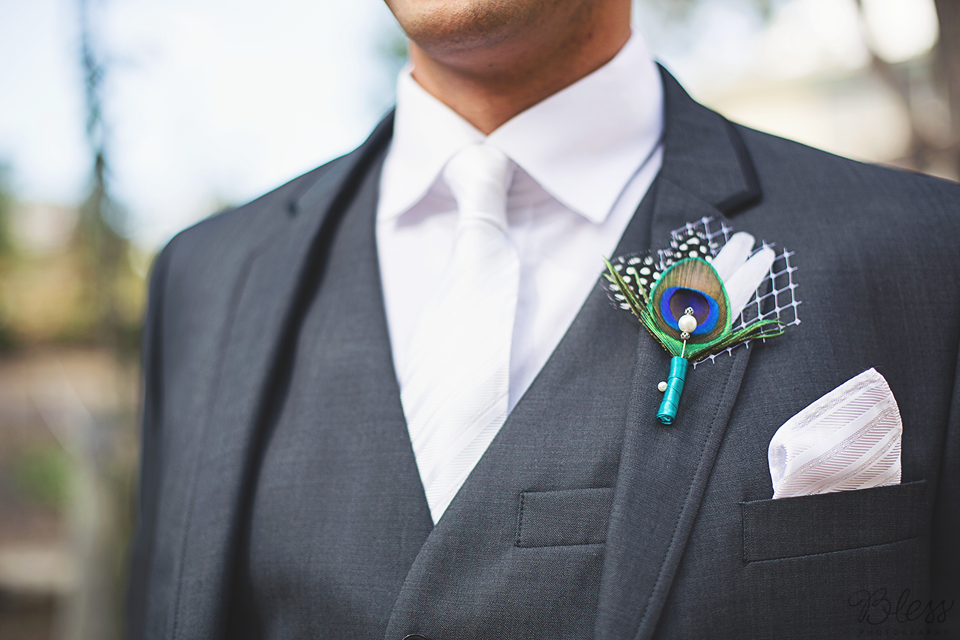
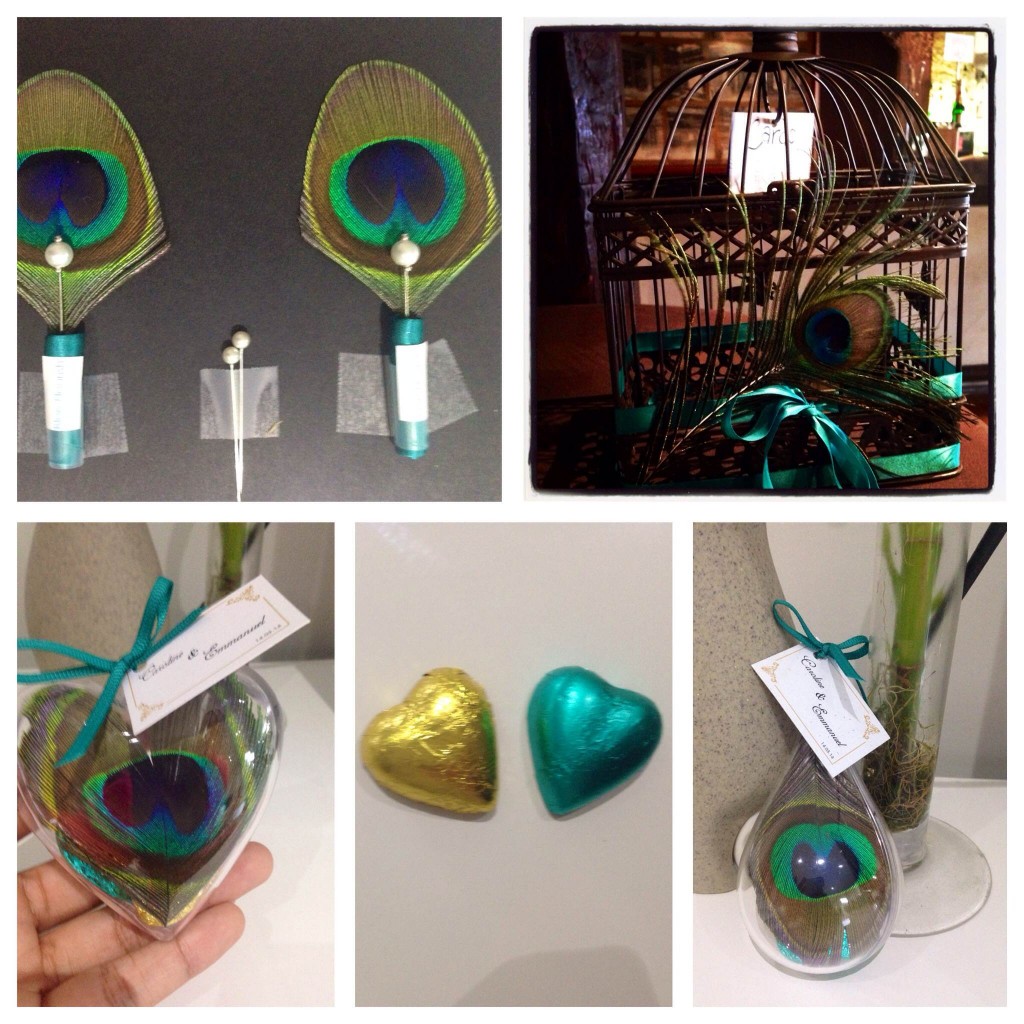
When I chose a theme for my wedding, I wanted it to have some meaning behind it.  I chose the theme of the peacock and my theme colours were green teal and gold.

The peacock is a beautiful representation of loyalty, mercy, good fortune, and undying love. Peacocks are believed to be pure of heart, loyal and faithful to their partners. It symbolises eternal love. The male peacock goes to great lengths to attract its heart's desire. It is said that the peacock dies of grief if it loses its loved one. I chose the peacock to represent my marriage and the love that Emmanuel and I have for each other.

Although I had a theme, I didn't want to go too hard with it. Instead I wanted the peacock theme to be rather subtle and not too in-your-face. We used peacock feathers for the buttonholes, favours, wedding invites and the wishing well, that's it. I felt too many peacock feathers everywhere would look tacky.

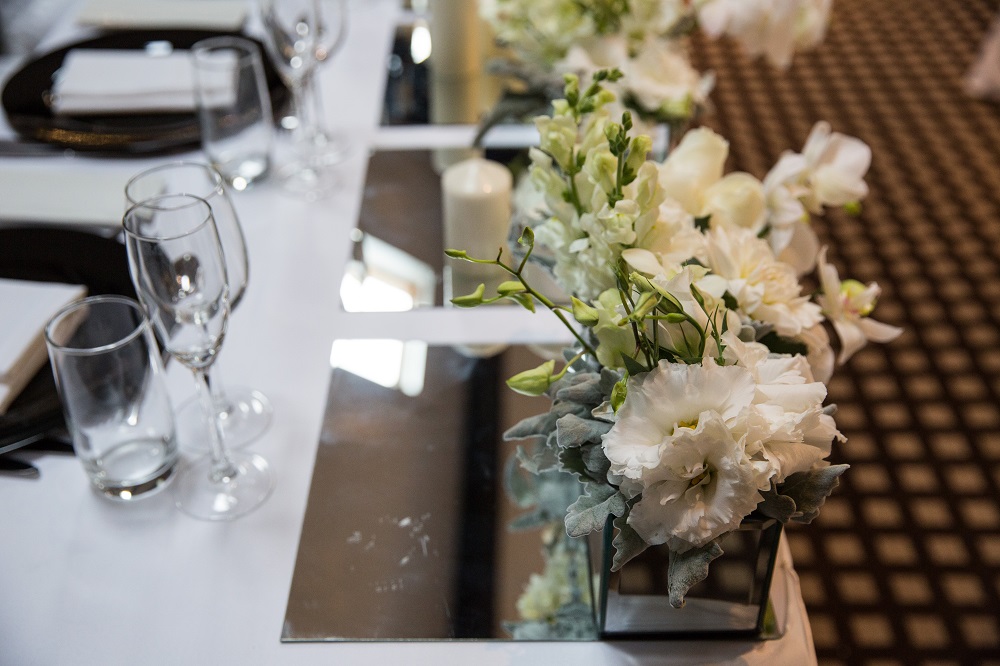
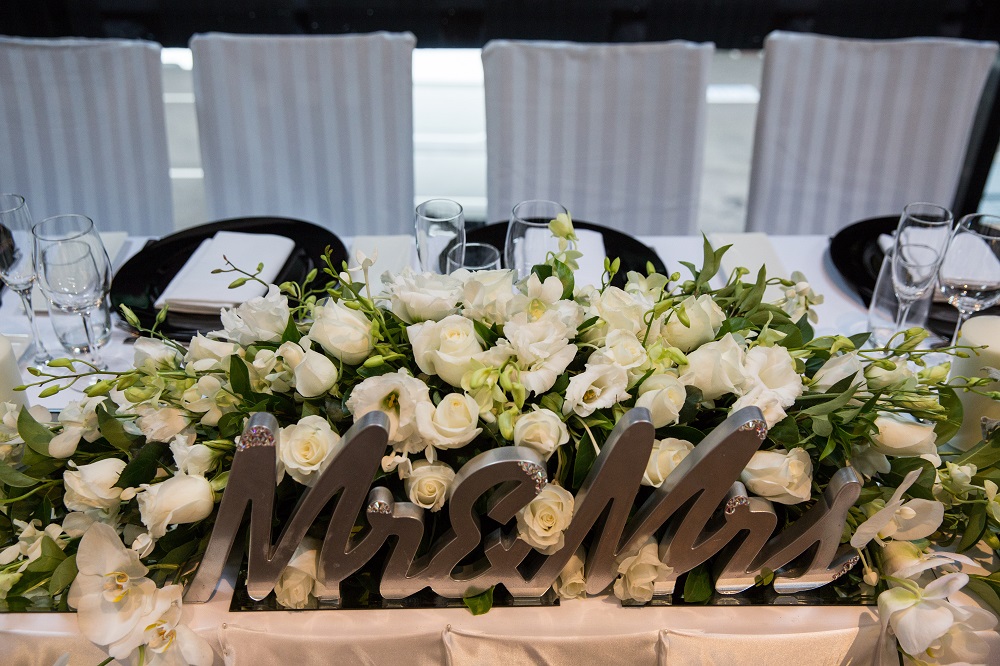
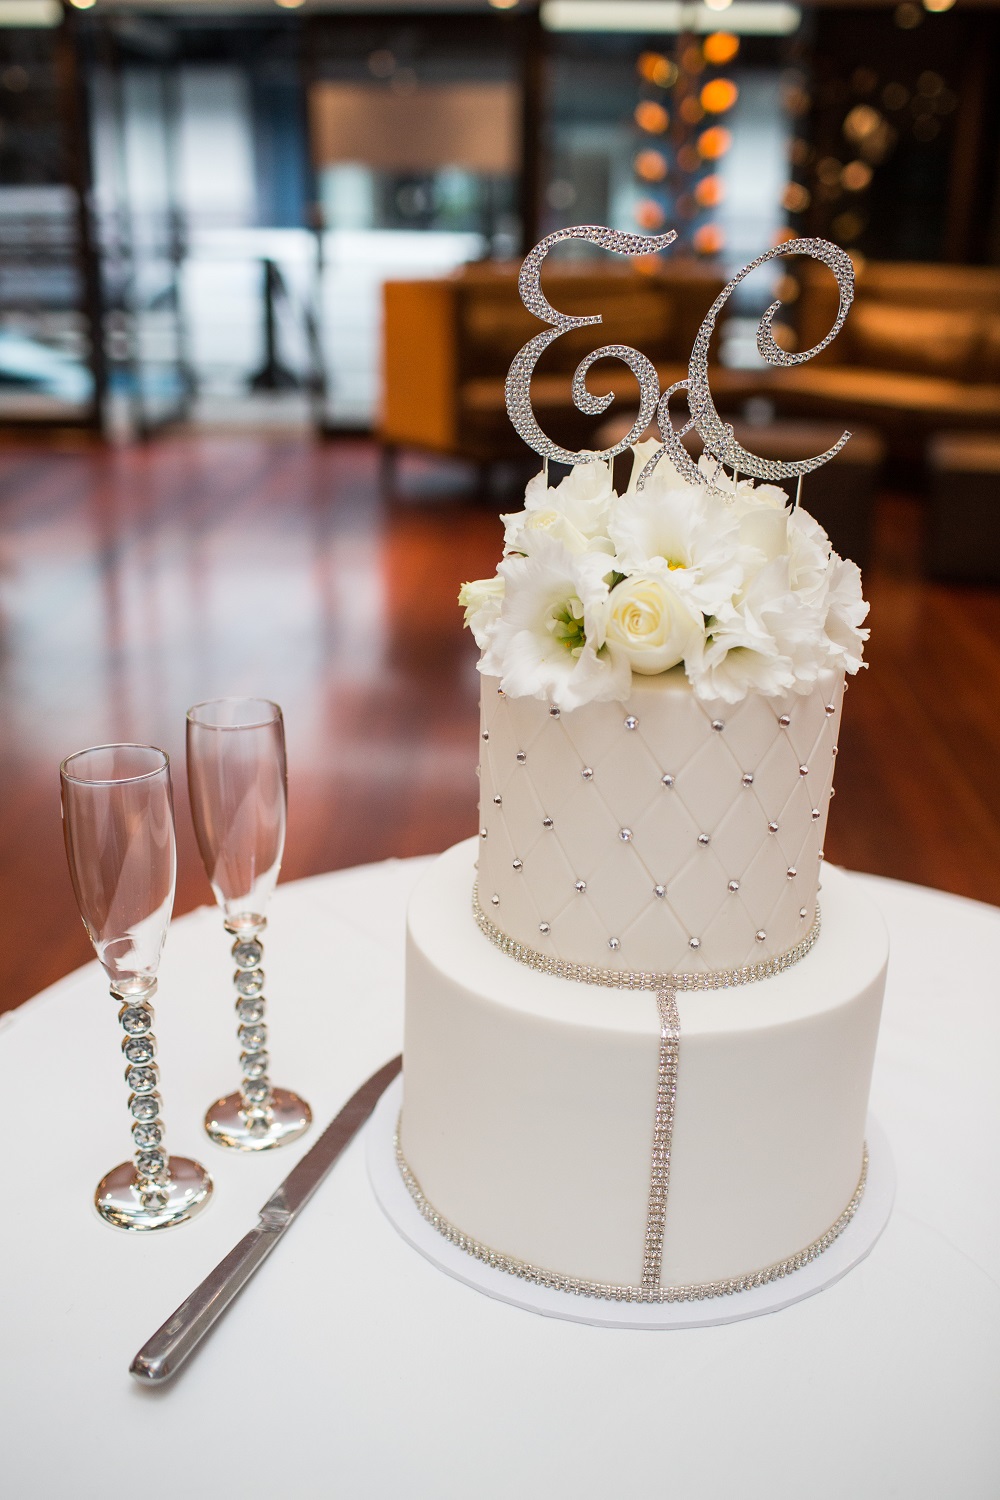
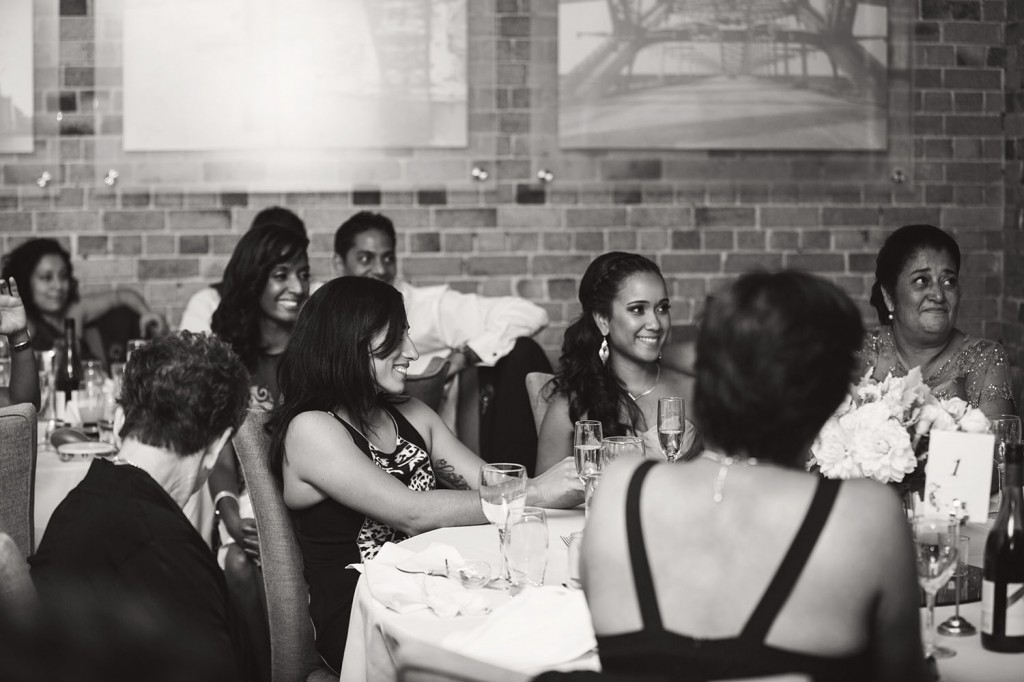
I wanted my wedding to be classy, romantic and elegant.  There were beautiful fresh flowers and tall candle stands at the reception. The tables were beautifully set with flowers and tea light candles as centrepieces.

0007 (2)

18

Tell us a little about your wedding dress?

17

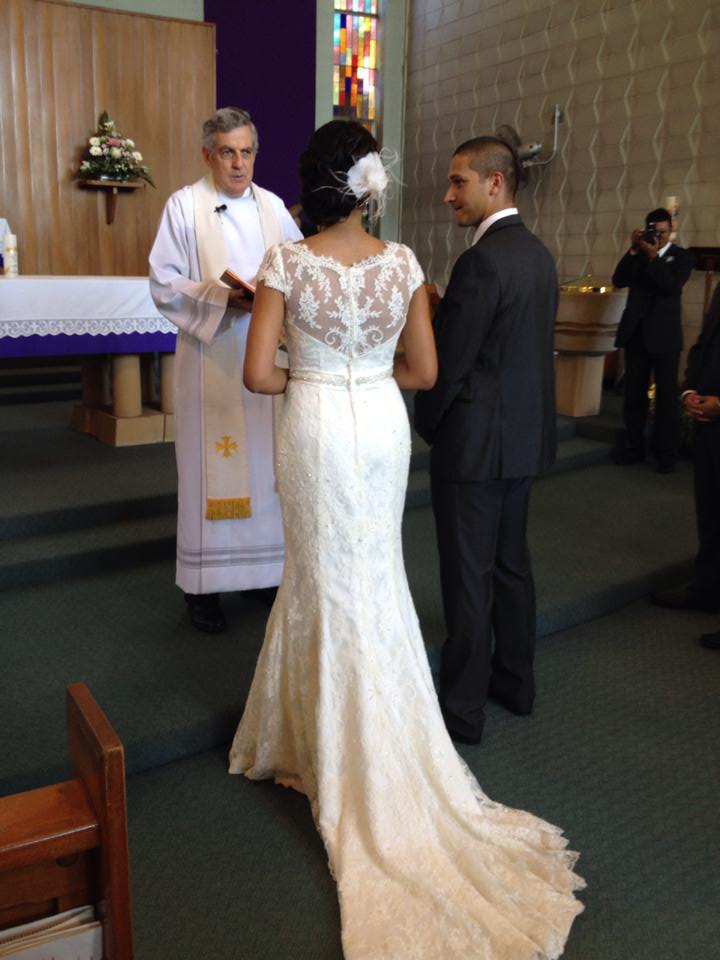
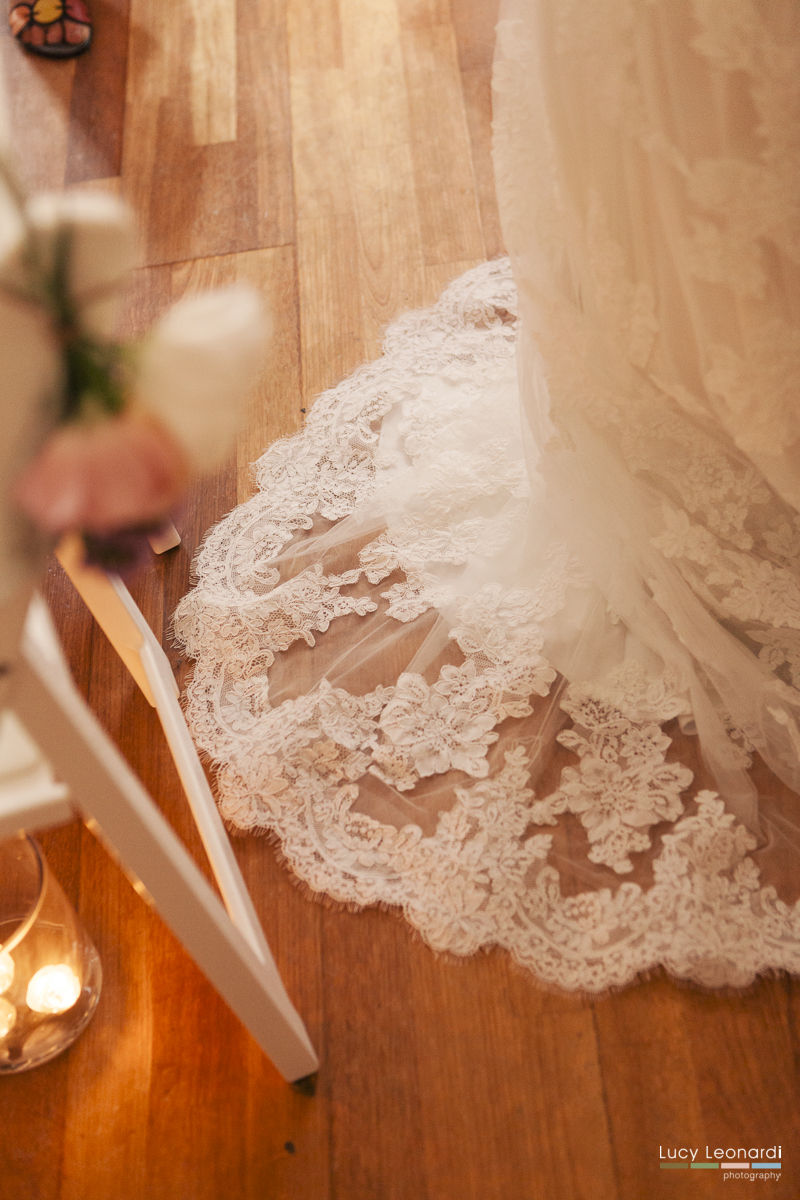
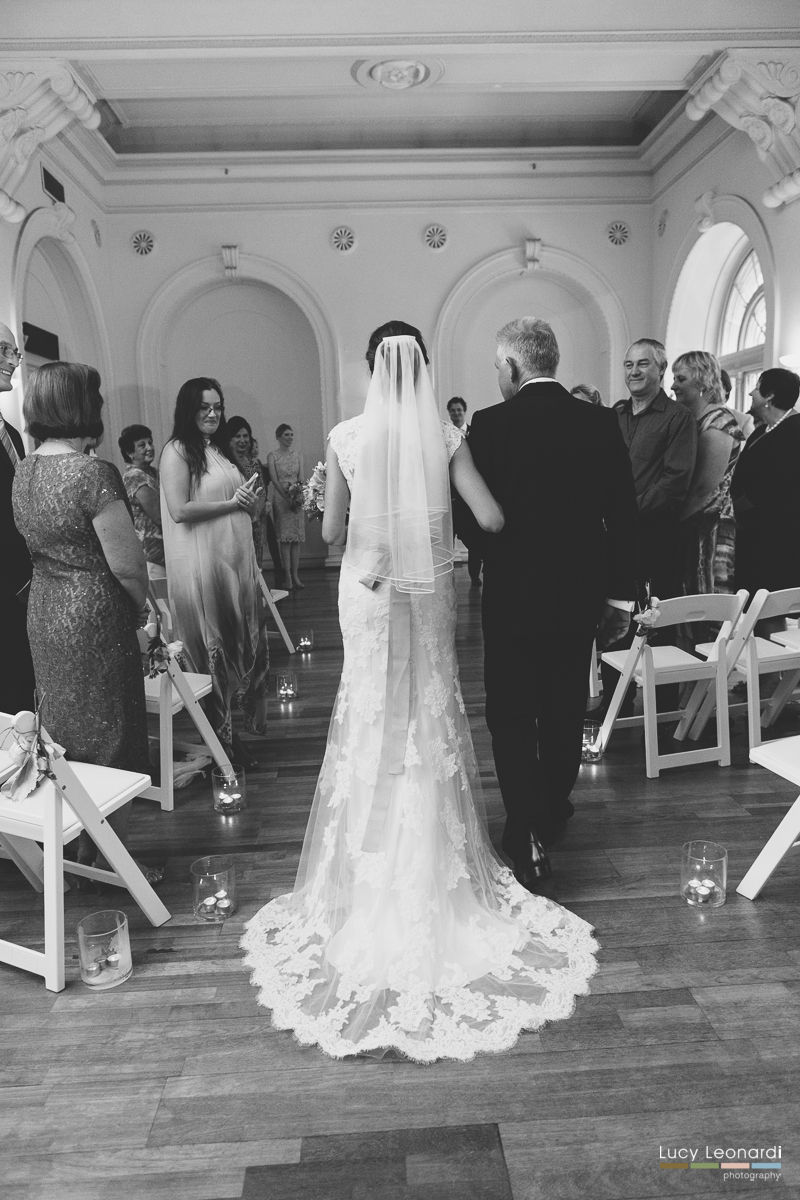
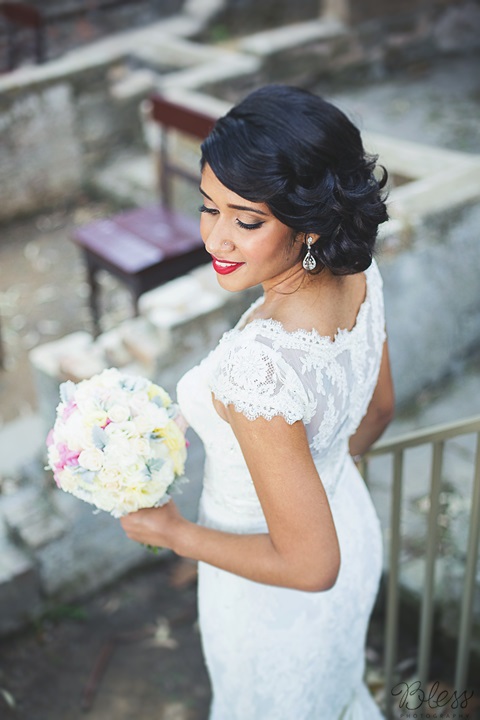
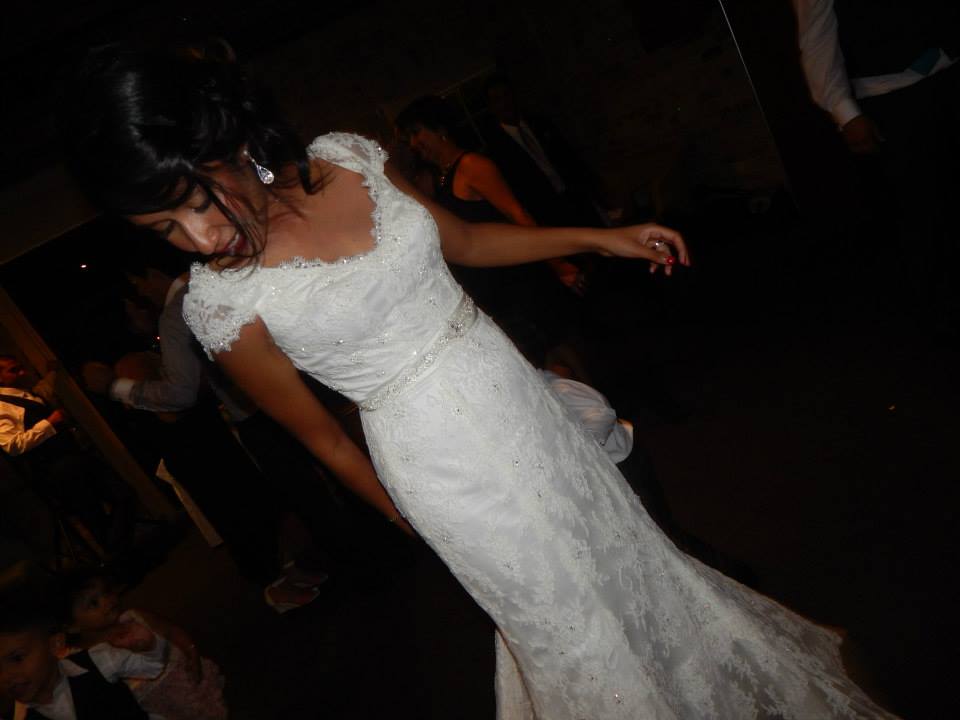
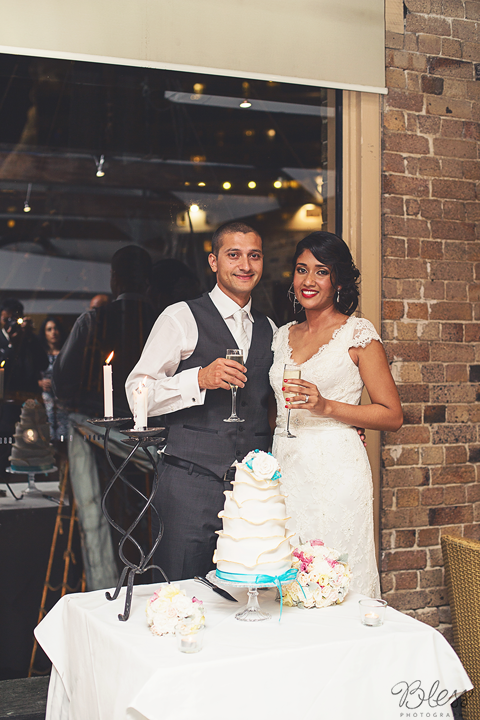
My wedding dress is by Jean Fox. It's a gorgeous and elegant lace, mermaid style dress. I bought it off the rack from Spurling Parramatta (http://www.spurling.com.au/bridal/).  It needed some minor alterations but it was the perfect dress for me. The style of the dress really suited my figure and was in line with the vision I had for my wedding.

16

Why did you choose the venue?

14

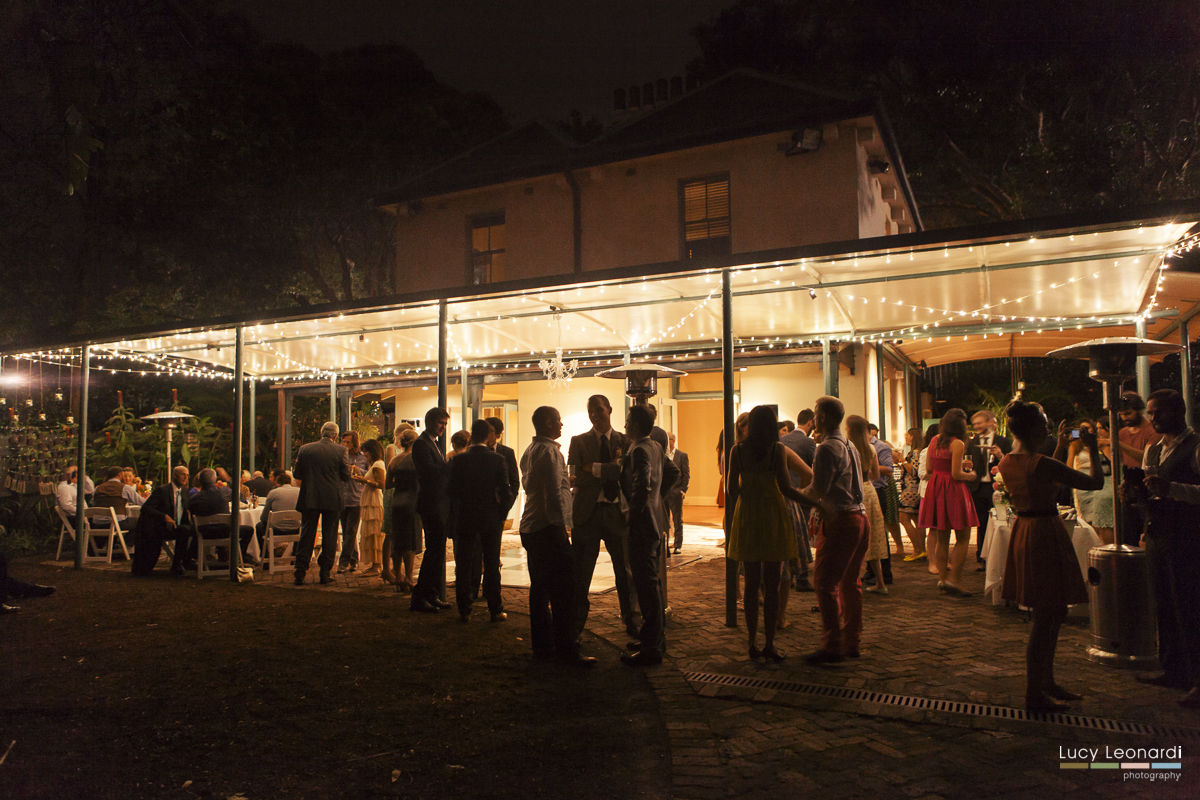
My wedding reception was at Wolfies Bar & Grill at The Rocks, Sydney.  When choosing the venue, there were two main things I was looking for:

1. The size of the room. I only had 30 people at my wedding, so I needed a rather small room. I didn't want a big room to look bare with only 30 people in it.

2. I wanted my venue to be very Sydney-ish, meaning it had to somehow include the Opera house and/or the Harbour Bridge. I had family travelling from Mauritius to attend the wedding and I wanted that strong "Sydney-feel" to be present in my wedding.

We had two rooms at Wolfies Bar and Grill and both had amazing views of the Opera House, the Harbour Bridge and the harbour. One room was for the seated dinner and the room right next to it had the dance floor and wedding cake table. It was the perfect location, the perfect size for what I was after. And all within my budget!

(http://docksidegroup.com.au/restaurants/wolfies)

9

11

What about your flowers?

10

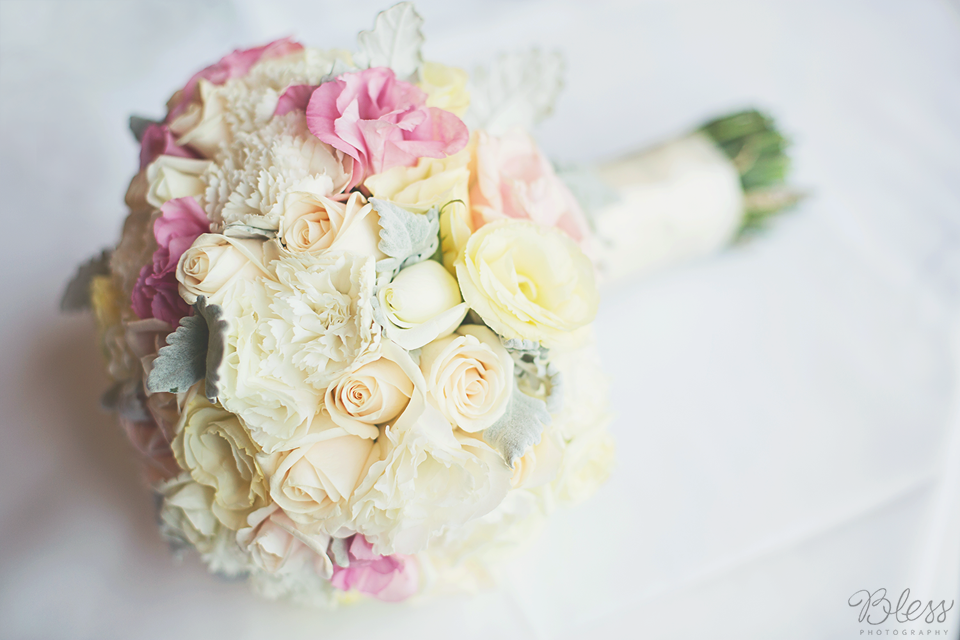
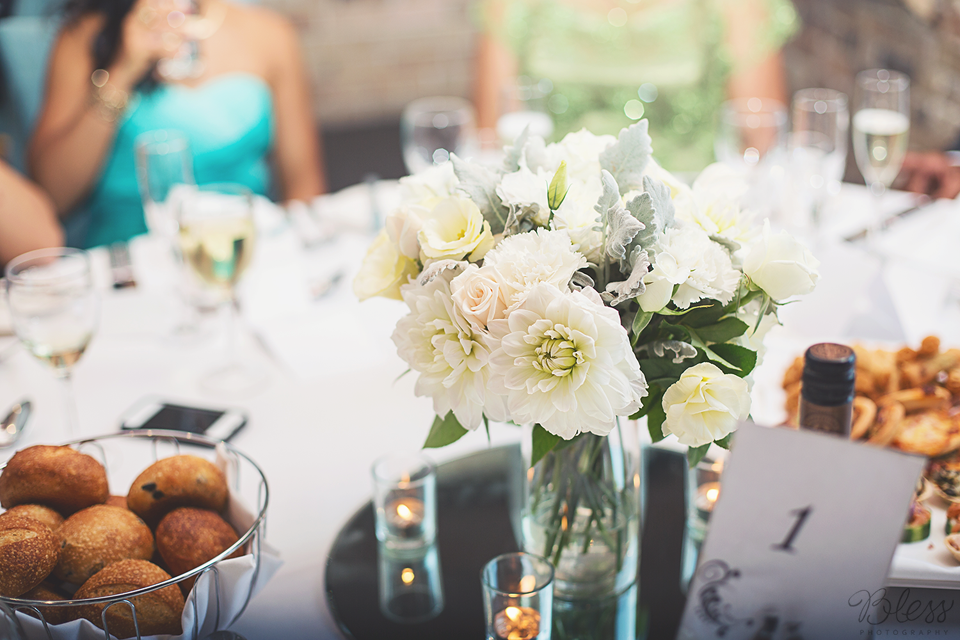
For my wedding flowers, I used the services of 'Wedding Flowers by Jody'. Jody McCure is based in Blacktown. She makes really beautiful flower arrangements and posies at a very reasonable price.

For the bridal posy, she used a mix of different seasonal flowers. It was mostly white, with some very pale pink flowers and sea foam green leaves. The centrepieces were also very beautiful and in line with the elegant/romantic feel I was going for.

(http://weddingflowersbyjody.com.au)

What about your photographer?

I was on a rather tight budget for my wedding but one thing I was ready to pay for, was my photos! I want to be able to look back at my wedding photos in 20 years time and still be extremely happy with them and have these memories forever.

When I did some research online, I came across Bless Photography (http://www.blessphotography.com.au) and there was something about the photos on their website that I found very genuine.  You can almost feel all the emotions of the subjects in the photographs. That's exactly what I wanted for my wedding photos.

When I met with Tamar and Matt Porter, I was immediately sold, not just because they take amazing shots, but also because they are a lovely and genuine couple. Tamar is the photographer and Matt is the videographer. I ended up hiring both for my wedding and I'm very happy I did. I felt so comfortable with them, and they work really well as a team, paying attention to every detail.  They listened to what we wanted, but also guided us when necessary.  The process was 'hassle-free' and they were discreet and professional the entire day.  Nobody could really feel their presence and I got those spontaneous and natural shots I was after.

I was blown away by my pictures and I particularly love how the happiness, love and joy that everyone felt on the day came across so vividly in the photographs as well as in the highlight film. I couldn't be happier with Bless Photography!

List of Suppliers:

What makeup brands are in my kit?

One of the questions I get asked most by clients is "What brand of makeup do you use?"


The answer is that I don't use one particular brand of makeup, as I don't believe one brand completely satisfies my needs as a makeup artist.


I have possibly over 15 brands of cosmetics in my kit, and that number increases all the time.  I am constantly discovering new amazing products and ditching products that no longer work for me.  I believe in using the best and if that means using a different brand of primer to lipstick to foundation, then so be it.  I also need to cater for all skin types and colours, so one foundation is going to look great on one person, but could terrible on another person.  I need full coverage matte foundations like Makeup Atelier Paris, medium coverage dewy foundations like Make Up For Ever HD, primers for oily skin like Graftobian Anti-Shine, and primers for dry skin like Embryolisse.

foundations

At Makeup Artistry by Rebekah I believe in giving my clients a professional service, using only the best professional and high quality products.  Using brands that are used by professionals is important to me. 

My favourite blushes and illuminators are definitely NARS.  "Luster" is one of my favourites.

nars


The ultimate professional eyeshadow palette has to be the Viseart neutral palette. Unbelievable staying power and colour pay-off, not to mention blendability!

viseart

Viseart and Inglot also score well on the IN MY KIT website page developed by Kevin James Bennett, which has become the bible of most makeup artists around the world.  See here http://inmykit.com/eyeshadow.htm

My three favourite black gel liners have to be Makeup Atelier Paris waterproof gel liner,  INGLOT Gel Liner and MAC fluidline eye liner in "Black Track".  Again, mentioned on IN MY KIT at http://inmykit.com/eyeliner.htm

Each are favourites for many reasons – Atelier because it is completely waterproof, Inglot is smudgeproof and is extremely black, and MAC works well in the waterline where others may smudge.


inglot

Wayne Goss (my favourite You Tube Makeup Artist) also rates Atelier and MAC gel liners on this YouTube review https://www.youtube.com/watch?v=Jdt63-nm6UQ


There are way too many of my favourite lipstick brands that I could list.  M.A.C, are a definite favourite.

IMG_3432.JPG (2)

Lime Crime also have an incredible range of lip stains – lime crime velvetines.  I have reviewed these lip stains in a previous blog post found here: http://makeupbyrebekah.com.au/blog/top-product-for-july-2013/

lime crime 3

So the answer to the question of what brands do I use in my kit is:

Makeup Atelier Paris, Face Atelier, Make Up For Ever, NARS, M.A.C., IT Cosmetics, Ben Nye, Stila, Cinema Secrets, Graftobian, Embryolisse, Skindinavia, Viseart, Model in a Bottle, Urban Decay, Lime Crime, Chanel, Inglot, and the list goes on….


Rebekah Foxe

Makeup Artistry by Rebekah

www.makeupbyrebekah.com.au

Urban Decay Naked Palette – vs – Chi Chi Nude Palette

The Urban Decay Naked Palette is a staple eyeshadow among many makeup artists for many reasons.  Consisting of 12 neutral colours, they suit any skin tone and can create so many different looks, from a bronze eye to a smokey grey – this palette is a must have for everyone!


The palette comes in a luxurious chocolate and gold velvet box with a beautiful eyeshadow brush.  You also get a travel-size primer potion which aids in maintaining a crease-free look all day. 


Naked Palette2

You can purchase the Urban Decay Naked Palette from Beauty Bay for $58.80 including delivery.  The 12 colours are listed on their website at http://www.beautybay.com/cosmetics/urbandecay/nakedpalette/


The colours are:

– Virgin eye shadow (Nude satin)

– Sin eye shadow (Champagne shimmer)

– Naked eye shadow (Buff Matte)

– Sidecar (Beige with glitter)

– Buck (Brown matte)

– Half baked (bronze shimmer)

– Smog (golden brown shimmer)

– Darkhorse (dark bronze shimmer)

– Toasted (Taupe shimmer)

– Hustle (Mocha shimmer)

– Creep (black with sparkle)

– Gunmetal (dark grey with sparkle)


Word on the street is that Chi Chi is selling a dupe of this palette for around one third of the price.  Curiosity got the better of me so I decided to purchase the palette from Myer for a bargain price of $19.95!!!  At first glance you can see why people are saying this is a dupe of the Naked palette – the colours look almost identical.  The main difference at first glance is the packaging – the Chi Chi palette is in a cheaper looking plastic palette with two double-sided sponge applicators rather than a brush.


naked palette

When I first used the Chi Chi palette I must admit I was surprisingly impressed – the eyeshadows went on really nicely and the pigment was pretty good!  It was definitely a little messier than the Naked Palette and I had a fair bit of fallout, but nothing that can't be whisked away with a brush.  The colours blended well together.  A tick of approval from me!!!


I took some colour swatches of the colours from each of the palettes to compare – you can see that there are a lot of similarities, but a few of the colours are a tad different, for example the "darkhorse" colour is a lot darker and pigmented in the Naked Palette, and "half baked" is more bronzy in the Naked Palette.

In natural light (on a gloomy day) TOP ROW IS THE NAKED PALETTE, BOTTOM ROW IS THE CHI CHI PALETTE:


naked chi chi 2

And under LED light:


naked chi chi

Overall, the Chi Chi is a great palette to have in ones personal makeup collection – I really like this palette and will continue to use it for personal use.  However, the Naked Palette is a bestseller for a reason – the quality is definitely more superior when comparing to the Chi Chi palette.  The shadows are a lot more pigmented and a little bit goes a long way.  So it's staying in my professional kit (no offence to Chi Chi!!!)


Rebekah Foxe
Makeup Artistry by Rebekah
www.makeupbyrebekah.com.au

Joel Madden’s Sydney Housewarming Party – special guests Simmone and Sam

You may remember back in January I published a blog post about two lovely girls from Townsville, QLD who travelled to Sydney to attend the Australia Day Cricket Test with Joel and Benji Madden!  I was lucky enough to do the girls' makeup for their dinner-date with the Madden Brothers!

You can read that post here: Simmone, Australia Day and the Madden Brothers


You can imagine my surprise when I received an email from Simmone a few months ago telling me that she had won yet ANOTHER competition, this time one sponsored by Vodafone, to attend Joel Madden's Sydney Housewarming Party!!!  I felt honoured to be asked to do the makeup for her again, as well as for her sister, Sam.

I attended the girls hotel room overlooking Sydney Harbour to do their makeup – the theme at this event was "Rock" so we went with a bold winged shadow smokey eye for Simmone, and an orange rock lip for Sam, with long lashes. 

The girls each wear Atelier Paris Waterfproof foundation, Atelier Paris concealer, Cinema Secrets cream foundation, Atelier Paris eyeshadows in various colours, MAC Magnetic Fields eyeshadow (Simmone only), Makeup and Glow gel liner, Elementwo Airbrush Blush, Sleek blush in Rose gold, and Red Cherry lashes (Simmone wears #217 and Sam wears #12).  Simmone wears lipstick Makeup and Glow Ash Rose and Tea Rose (mixed) and Sam's orange lips are Lime Crime Velvetine in "Suedeberry".

Here are the girls before and after photos (thanks for allowing me to post them, ladies!). 

SIMMONE

SIMMONE before and after2


SAM

SAM before and after

And the girls dressed and ready to leave:

simone and sam

Last (but definitely not least) here they are with the main man himself, Mr Joel Madden (Vodafone official photograph):

IMG_2940

I have spoken to Simmone since the event who said it was an "excellent night!"

She said that "the boys (i.e Joel and Benji) are intoxicating, she wanted them around forever, and is just so grateful". 

"The party was amazing", she says.

I am so pleased that she got to hang out with the boys again, both ladies are beautiful people (inside and out) and deserve the happiness this experience has brought them.

I look forward to doing their makeup again for the next Madden Event!!!


Vodafone's official LIVE BLOG page can be found here: 

http://community.vodafone.com.au/t5/Welcome-guidelines-and-FAQ/Joel-Madden-s-Housewarming-Party-Live-Blog/m-p/205944


Rebekah Foxe
Makeup Artistry by Rebekah
www.makeupbyrebekah.com.au


Product review – Luscious Cosmetics

I was recently approached by Suzanne at Luscious Cosmetics about trialing and reviewing some of her new cosmetics range.

LUSCIOUS COSMETICS TM is an Australian owned Makeup Company designed by a professional makeup artist in a superior lab. Suzanne is a professional makeup artist in Sydney, as well as a mother of five children.

I was sent three beautiful products to trial:

The first being the Camera Ready Face Primer (RRP $50).

Luscious primer

Like other silicone primers, this primer will lessen the appearance of fine lines and wrinkles, providing grip and longevity to your foundation.  I loved the feel of this primer – and reminded me of other professional silicone primers I have used. A little goes a long way!  I recommend this primer to anyone looking for an Australian alternative to other overseas brands. I love to support Australian brands!!


The next product sample I was given was the Luscious Mousse Foundation (which retails for $48):

lusciousmousse

This is a BEAUTIFUL foundation – glides on like mousse, and sets like velvet on the skin with a beautiful finish.  I loved the feeling of this foundation.  It provides medium coverage too, which is great. Again, a little goes a long way with this product.


The final product was the Flawless Finish Foundation (RRP $45).

liquid face makeup f wht

This is a lovely water-based liquid foundation which provides a light to medium coverage and is PERFECT for everyday wear.  I am currently wearing it as I type this post, and I've had it on for about 7 hours (2 hours of which was out in the sun).  It still looks great and it doesn't feel heavy on the skin at all.  A definite thumbs up from me!


Overall, the Luscious Cosmetics Brand has definitely proven to be something I would buy.  I love to support Australian industry and Suzanne is an absolute pleasure to deal with.

You can order online at http://www.beautylusciousandco.com.au/index.php/lusciouscosmetics

Or you can contact Suzanne at http://www.beautylusciousandco.com.au/index.php/contactus


You can also get your luscious products online via LUXOLA which is South-East Asia's largest beauty e-tailer!!!  You can buy it here http://www.luxola.com/au/brands/luscious


Rebekah Foxe

Makeup Artist

Makeup Artistry by Rebekah

www.makeupbyrebekah.com.au

HYGIENE!!!!!!!!!!!!!!!!!!!

Hygiene is the most important thing when it comes to makeup, and is definitely one thing everyone should look for in a makeup artist.


I can't begin to tell you the amount of horror stories I hear from client's and colleagues relating to "makeup artists" who don't use disposables and who double dip things like mascara and gel eyeliner!  Not to mention applying lip glosses straight from the tube! YUCK!!!!!!!!!!!!!


Disposables are SO important, especially when it comes to mascara.  Mascara is a haven for bacteria, which is why you should NEVER double dip mascara or share your mascara with anyone. I only use disposable mascara wands – one dip and once the product is used the wand is thrown into the bin.  The last thing I want is to potentially spread an eye infection from one client to another.


All brushes and beauty blender sponges should be cleaned and sterilised between clients as well.  I always factor in 5 or 10 minutes of time between my clients so that I can clean all my brushes with an alcohol-based cleaner which kills any bacteria and makes the brush sterile for the next person.


Makeup artists should also use a medium like a tile or palette for decanting products before application.  If the back of the hand is used, the hand must be cleaned and sterilised with a product like Aqium.  I personally use a tile, so some product is decanted onto the tile using a spatula, and then the product is applied to the face using the necessary brushes and sponges.  Once that client's makeup is finished, the tile is washed and sterilised using medical-grade steri-strips ready for the next client.


Fingers should never be placed into a makeup product, like a cream foundation or blush.  Your fingers contain bacteria that will then contaminate the product.  Always use a spatula to decant, even when you are just "testing colours".  I use beautician sticks which look like paddle-pop sticks, as it's easy to just throw them in the bin once the product is decanted.


As far as personal makeup goes, of course you can be less stringent, but brushes should still be cleaned and sterilised often to prevent the growth of bacteria.


hygiene

Rebekah Foxe
Makeup Artistry by Rebekah
www.makeupbyrebekah.com.au