There's nothing like watching your child dance up on stage at an eisteddfod or dance concert. Hair and makeup is often just as important as the costume, and it's important to get it right so each dancer can shine on stage.
It can be very daunting for some parent's (and children/teenagers old enough to do their own makeup) having to apply stage makeup for concerts and eisteddfods, especially if makeup really isn't your forte!
So here are a few tips on how to achieve DANCE MAKEUP that really stands out on stage.
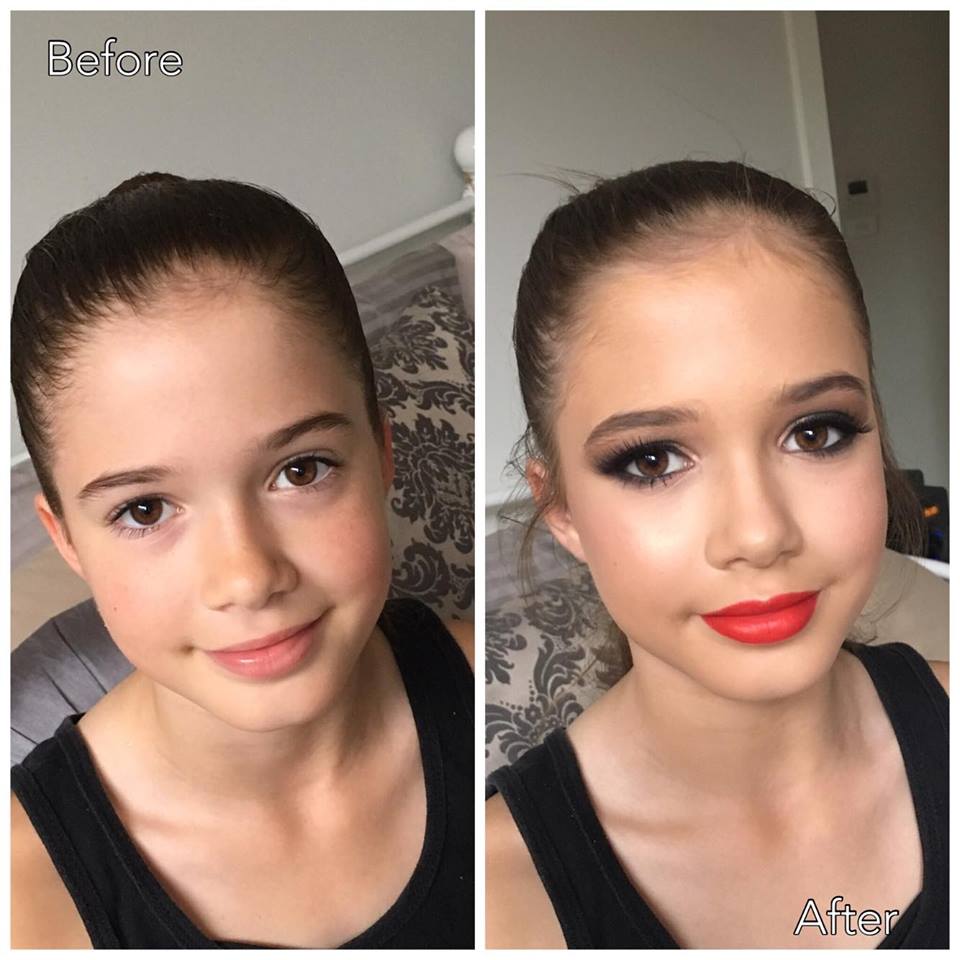
We will start with a before and after photo of the beautiful Isabella. The makeup enhances her features to make them stand out.
BRUSHES: The secret to good makeup is in the brushes. It's worthwhile to invest in a good (but reasonably priced) set as it can make all the difference. Crown Brushes sell good quality brushes at very affordable prices – like this 15 piece set for $35 http://www.crownbrush.com.au/products/brush-sets/set-r15 plus you will need to add this fluffy brush for blending eyeshadow http://www.crownbrush.com.au/products/crown-pro-line/pro-blending-fluff-1
You can also buy affordable brushes at Priceline including the Manicare and Models Prefer brands. The Real Techniques Brushes are some of my favourites!
STEP 1 – PRIMER
Often dancers are required to wear their makeup for an entire day, so it's important to use products that will ensure the longevity of the makeup. Primer is very important for two reasons – it increases the staying power of the foundation, and it prepares your skin for a more perfect foundation application. My favourite primers are the Laura Mercier primers (available from David Jones), but a good budget option is the Face of Australia primer available at Priceline for less than $12. You can buy it here https://www.priceline.com.au/face-of-australia-face-base-primer-50-ml
If you're a teenager with oily skin, use a mattifying primer in the t-zone where the skin is prone to shine. I like to use the Make Up For Ever Step one Mattifying Primer.
Prepare your lips by applying a lip balm like Lanolips or Paw Paw ointment. Exfoliate them often using your tooth-brush (it really helps to get rid of all the dead skin).
STEP 2 – EYES
I prefer to start with the eyes first, especially when doing stage makeup as under the eye area can get quite messy with fall out. This allows me to clean up under the eye before applying foundation for a cleaner finish. It also allows the primer to settle into the skin before applying foundation.
It's important to go over the eye-lid and under the eyes with the foundation you are using. Then, use an eye primer all over the eye lid to create a smooth base and something for the eye-shadow to adhere too. This step will also increase the longevity of the eye makeup and prevent smudging. I recommend the Too-Faced Shadow Insurance eye primer which is available from Mecca Maxima/Cosmetica for $28 http://mecca.com.au/too-faced/shadow-insurance/V-005534.html
The Urban Decay eye primer is also great, not to mention the MAC Paint Pots.
A good budget alternative is the Face of Australia eye primer available from Priceline for less than $9 https://www.priceline.com.au/face-of-australia-stay-on-eye-primer-15-ml
If you don't want to use an eye primer, applying concealer to the entire eye lid can do the job.
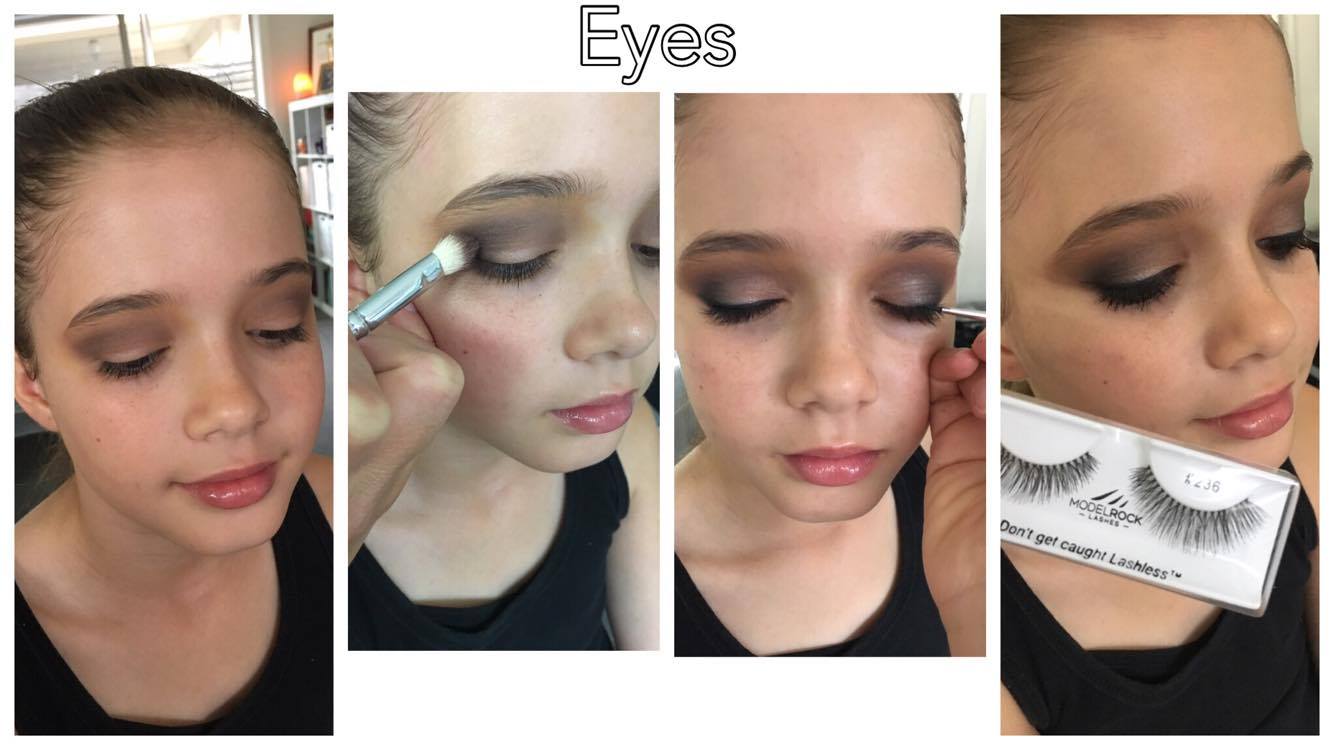
Once you've primed, go over the entire lid with a nude eyeshadow. Then, with a small fluffy brush apply a soft brown eye-shadow in the crease, bringing it down to the lash line. With the same fluffy brush, apply a medium brown/taupe to the outer part of the eye lid, making sure you blend it in. Then again, build up the eye-shadow by applying a darker brown and then a black so that the black is the smallest section of eye-shadow on the outer lid, closest to the lash line. Blend the colours in with a clean fluffy brush.
Apply a shimmery gold/bronze eye-shadow to the inner lid, and the inner corner to open up the eyes.
Apply a pearl shimmer shadow to the top of the brow bone just below the eyebrow.
With an angle brush, apply eyeshadow to the lower lash line using lighter colours toward the inner part, and darker shadows along the outer part of the eye, toward the ear.
A good eyeshadow palette with great colours for dance makeup is the CHI CHI Nudes Palette, available from Target for less than $23 https://www.target.com.au/p/chi-chi-glamorous-eyes-palette-nudes/52114243
Models Prefer have some great nude palettes too – available from Priceline.
Clean up any fall-out from the eyeshadow, using a Micellar water on some cotton buds, or even makeup or baby wipes.
Line the top of the eye with a gel or liquid eye-liner, and the bottom lash line also needs to be lined (you can also use a pencil). Stop the bottom eye-liner just short of the outer corner, and bring it out horizontally to open up the eye.
Next, apply mascara to the top and bottom lashes.
Trim your strip lashes to size before applying the glue. Make sure the lash glue is tacky (wait about 20 seconds after applying to the lashes) before adhering to the eye lid. On the outer part of the eye lid, lift the lash in an upward direction placed slightly above the lash line and onto the eye lid, to open up the eye.
I use and recommend Modelrock lashes. The Pick and Mix set are really good value at less than $2 a pair. 212, 259, and 236 are great "stage" lashes. You can buy them here http://www.modelrocklashes.com/categories/bulk-pick-mix-lashes.html
Make sure you press the lashes into your real lashes with either tweezers or your fingers.
STEP 3 – BASE
Now that eyes are done and your face is primed, it's time for the base. Using a buffing brush, buff a waterproof foundation in a colour one or two shades darker into your skin. I've used a professional brand of makeup called Atelier Paris on Isabella, but you can use something like Revlon Colourstay. The foundation is probably something you should splurge on as it will last you a very long time, and will prevent you having to re-apply. You can purchase the Atelier Paris Waterproof Liquid Foundations through Making Faces Makeup at https://www.makingfacesmakeuponline.com.au/face/waterproof-fluid-foundation
(For all my local dance mums and students, I am available for colour-matching if you would like to order these).
Apply concealer with a smaller buffing brush under the eyes in a V shape, down the nose, centre of the forehead, and chin. I've used MAC Pro-longwear concealer here.
Maybelline also make some good budget alternatives.

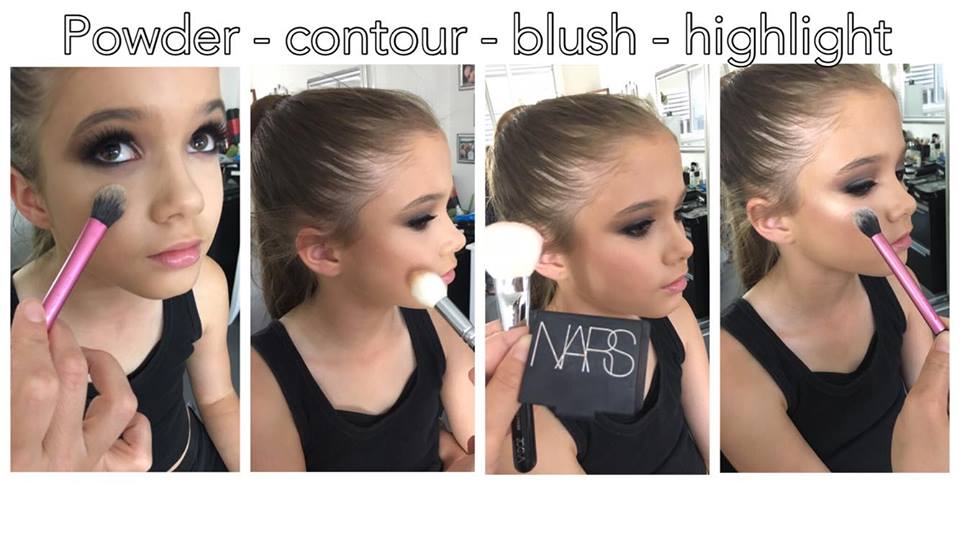
STEP 4 – CONTOUR / BLUSH / HIGHLIGHT
Once that's all blended in, dust and pat the face down with a translucent powder to set the foundation. A colourless powder is best. I use and recommend the Ben Nye Translucent powder available from Scotty's http://scottysmakeup.com.au/collections/ben-nye/products/tp
Using a Contour powder Draw a line underneath the cheek bone and blend upwards (do a fish face if need be to see where to place the contour powder). Apply and blend also to the temples and down the sides of the nose as well as under the jaw line. I've used the Anastasia Contour Palette on Isabella here, but a great budget alternative is the Models Prefer brand available from Priceline for $10 https://www.priceline.com.au/models-contour-palette-16-g
Apply a rosy pink blush to the cheek bones using a fluffy brush. I've used Nars Deep Throat on Isabella here.
Apply a highlight powder across the upper cheek bone. I have used The Balm Mary Loumanizer here which is the best highlighter I've ever laid hands on. You can purchase this from David Jones http://shop.davidjones.com.au/djs/en/davidjones/mary-lou-manizer or from Sephora for under $30. It will last forever. A great budget alternative is the Models Prefer Brand for less than $11, available from Priceline https://www.priceline.com.au/models-fame-fortune-highlighter-quad-7-4-g
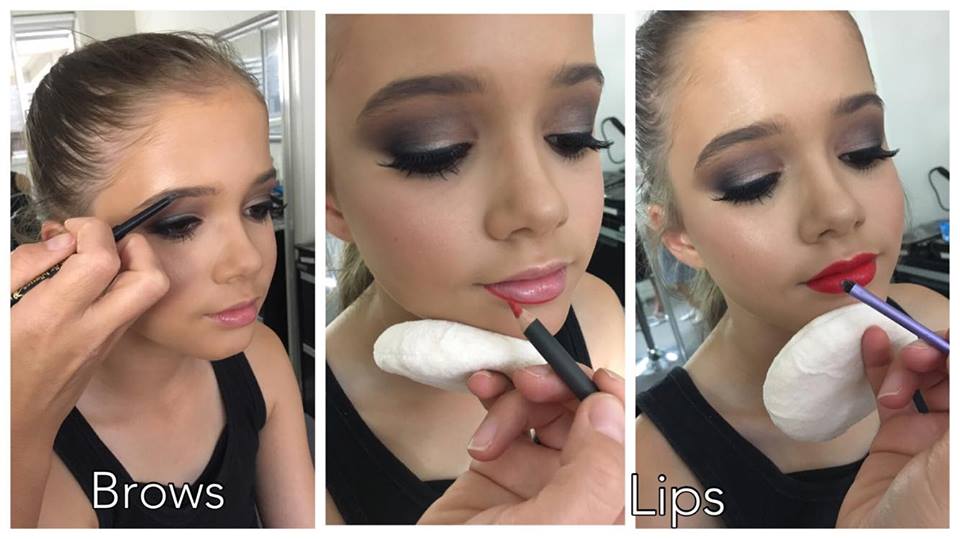
STEP 5 – BROWS AND LIPS
Fill the brows with a brow pencil or an eye shadow one shade lighter than your brow hair (applying with an angle brush). Remember, eye-brows are the frame to your eyes!
Line the lips with a red lip liner, and then fill with a long-lasting red lipstick. You can't go past brands like Revlon Colourstay.
STEP 6 – SETTING SPRAY
Set the makeup using a Makeup Setting Spray to ensure longevity and that the makeup stays on under all those stage lights. I use the Skindinavia setting spray, but a great budget alternative is the Models Prefer brand, available from Priceline for under $15 https://www.priceline.com.au/models-finale-make-up-setting-mist-120-ml
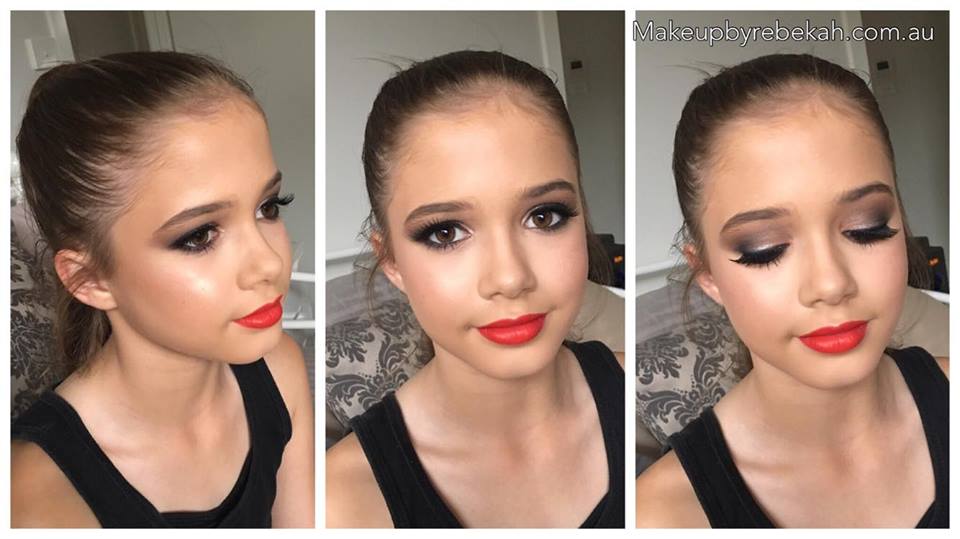
Let the show begin!!!!!
Feel free to email me with any questions at info@makeupbyrebekah.com.au
Rebekah Foxe
Makeup Artistry by Rebekah
www.makeupbyrebekah.com.au
